Sunday, April 10, 2016

Roasted Red Bell Pepper & Tomato Sauce with Sausage

  This hearty sauce takes some time, both in the prep - roasting bell peppers and a head of garlic - and the cooking- it simmers for a good 4 hours, but it's worth every minute spent on it. The house fills with such wonderful smells, you almost don't want to wait for it to finish, but you'll be rewarded when you do. The end result is a hearty, thick, rich and meaty sauce, perfect as a base for lasagna, baked ziti, or if you're eschewing carbs, it's lovely over a bowl of spiralized zucchini (zoodles!), the filling for pepperoni pizza bites (see below), or even just by itself in a bowl, topped judiciously with cheese.

Roasted Red Bell Pepper & Tomato Sauce with Sausage


Ingredients:

  • 2 red bell peppers
  • 1 head of garlic
  • olive oil
  • 8 0z bulk Italian sausage
  • 2 large onions, chopped
  • 3 large cloves garlic, minced
  • 4 tablespoons tomato paste
  • 1 cup red wine
  • 1 28-oz can of crushed tomatoes
  • 1 smaller can, 15 oz, diced tomatoes
  • dried oregano
  • dried basil

Directions:

  1. Pre-heat oven to 400 F.
  2. First, prep the red bell peppers and garlic for roasting:
    • Slice across the top of the garlic, cutting off a flat spot on the top to expose the cloves. Place in a ramekin and drizzle with olive oil.
    • Place the red bell peppers in a baking dish and drizzle a little olive oil over then. Turn a few times to coat. Place the garlic and bell peppers in the oven to roast. Turn the bell peppers every 20 minutes, removing them when all 4 sides are evenly charred. The garlic comes out when the top is browned, about 40 minutes.
    • Place the bell peppers in a brown paper bag, tightly fold down the top, and place the in a bowl to let them steam. one cooled, the skins should peel off easily. Scrape away the seeds and discard them, then chop the flesh of the peppers. Set aside.
    • When the garlic is cool enough to handle, separate the cloves and squeeze the roasted garlic into a bowl, and set aside.
  3. Brown the bulk sausage in olive oil, chopping well with the blade of the spatula.
  4. Once nicely browned, add the chopped onion and cook until the onion is soft and translucent. add the garlic and saute another 5 minutes.
  5. Dissolve the tomato paste in the red wine, then pour the mixture in the skillet. Stir well.
  6. Add the crushed tomatoes and diced tomatoes, bring to a boil, then reduce heat to low, cover, and let simmer for 2 hours, stirring occasionally to ensure that it doesn't bur on the bottom.
  7. Add the chopped roasted bell pepper and garlic, stir through, cover and let simmer another 2 hours.
  8. Add some salt, dried oregano, dried basil, taste to adjust seasoning. If the sauce seems too thick, you can add a little water if needed. Cover and let simmer for another hour.
  9. Taste once again and make the final adjustment for seasoning, and you're ready to serve with pasta, on zucchini noodles, shiratake noodles, or even by itself.
And now for some pictures! Beautiful, charred, roasted red bell peppers: roasted bell 
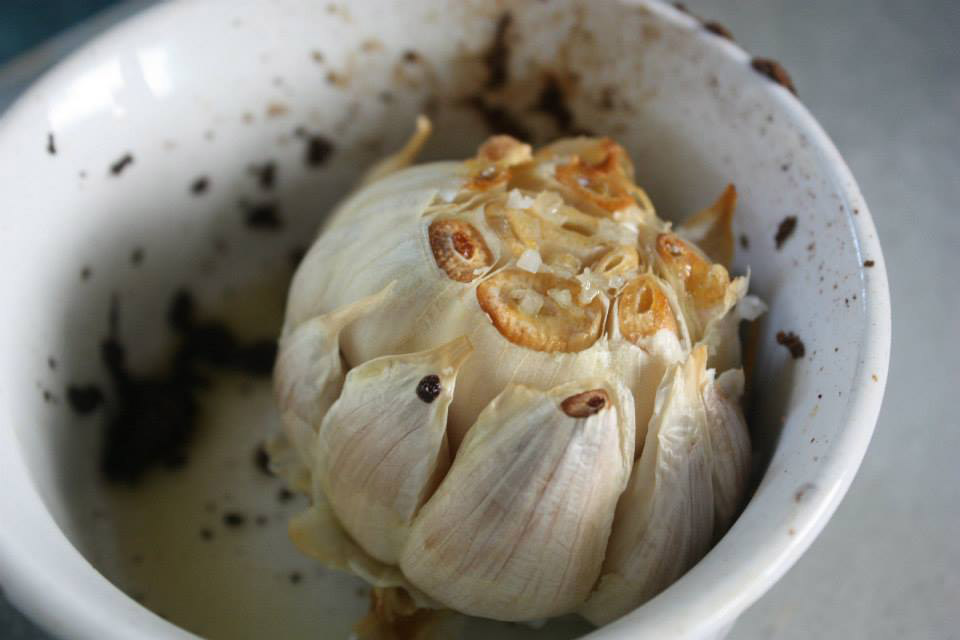
A head of roasted garlic, fresh out of the oven: roasted garlic

Thursday, April 7, 2016

Spicy Beef and Greens

Well, I'm back from the abyss of full-time work - though I'm still working full-time, I just hadn't been motivated to blog all that much. I've been crazy-busy with life's huge changes, and things have finally settled down to a routine of sorts.

I'm back to low-carbing, and to that end, I wanted to post some of my favorite staple meals that make low-carbing tasty and enjoyable. I very often make a Meat-n-Greens meal, switching out the protein - ground beef, ground turkey, chicken sausage, and the greens - spinach, kale, Swiss chard, and messing around the the flavor profiles - Asian, Cajun, Mediterranean. The end result is a great-tasting, satiating, fiber-rich meal, and it's easy, too, so that's a winner. There are no exotic, hard-to-fnd ingredients, so really, anyone could make it.

Spicy Beef and Greens


Ingredients:

  • 1/4 lb ground beef
  • 1/2 onion, chopped
  • 1/2 green bell pepper, chopped
  • 1/2 cup mushrooms, chopped
  • 1 clove garlic, smashed and minced
  • 1/2 t ginger paste
  • 1/2 t red chili paste
  • 1/2 cup beef stock
  • water as needed
  • splash soy sauce
  • 2 cups packed greens, chopped
  • cayenne

Directions:

  1. Over medium-high heat, saute the beef until brown.
  2. Add the chopped onion and cook until it begins to soften.
  3. Add the bell pepper, let cook for 2 minutes.
  4. Add the chopped mushrooms and cook until they’ve released a lot  of liquid and are starting to brown up.
  5. Add the garlic, ginger paste and chili paste. Stir through, then add the beef stock and a few splashes of soy sauce.
  6. Add the chopped greens on top, cover and cook until they are darker green and nicely wilted. You can add more water as needed to help steam.
  7. Remove the cover, stir thoroughly, add some cayenne and let cook until most of the liquid has evaporated.

Notes:

  • I sometimes buy ginger paste  and chili paste in a  tube for ease of convenience. Also this beef broth concentrate. I don’t always have my homemade beef stock on hand, and a squirt oor two of this stuff is great.

Calorie Breakdown:

Ok, by eyeballing and guessing at the amounts, this is the calorie breakdown for this meal.
This assumes that the nutrient breakdown in the Livestrong database is accurate:

spicy beef and greens cals.jpg

Thursday, December 27, 2012

Khachapuri

I have many food memories associated with my travels overseas; some quite fond, others not as much - there's nothing like a bout of food poisoning overseas to put the stamp of "Never Again" on a certain food! Thankfully, the good food memories far outweigh the unpleasant ones.

I was first introduced to Georgian food when I was studying abroad in the USSR in 1990 at a restaurant in Moscow called, if I recall correctly, Kavkaz. We sat around a long table and were treated to a small version of a legendary Georgian feast - small, but we were there for several hours and ploughed through many bottles of Georgian wine.

Although I enjoyed all of the dishes, especially the Chicken Satsivi, my favorite was the platter of Khachapuri which they served to us as part of the appetizer course. These cheese-filled boat-shaped breads had come straight from the brick oven and were viciously, piping hot, but we fell on them, ripping them apart and enjoying the stringy, gooey mixture of Georgian cheeses, most likely sulguni and imeruli.

I've always wanted to recreate it at home, but never got around to it until yesterday as I was snowed in by this winter storm. I knew there was no way I'd find the special cheeses without a trip into Brooklyn's Brighton Beach, "Little Odessa," so I did the next best thing: I improvised, and with pretty tasty results.


Khachapuri


Ingredients:
For the dough:
  • ½ cup warm water (check your package or jar of yeast for the correct temperature range)*
  • pinch of sugar
  • ½ teaspoon dry yeast
  • 1¼ - 1½ cups all purpose flour
  • ½ teaspoon salt
  • ¾ tablespoon olive oil
For the filing:

  • 6 ounces fresh mozzarella, crumbled
  • 4 ounces shallot and chive Boursin (herbed goat cheese is also good, about 3 ounces)
  • Approximately 1 tablespoon chopped fresh herbs - I like thyme and oregano
  • 1 teaspoon granulated garlic

  • Cornmeal for dusting
  • Sea salt and cool water for glazing


Directions:

  1. Place the warm water, sugar and yeast in a bowl and let sit until the yeast is foamy and has "bloomed," about 5 minutes. Add ½ cup of flour and stir to incorporate well. Add the salt, olive oil and stir well. Add enough of the remaining flour and stir until the dough starts to pull away from the sides of the bowl and form a rough ball.
  2. Turn the dough out onto a lightly floured surface and knead until smooth and elastic, about 8 minutes. Place the ball of dough in an oiled bowl, turning to coat evenly. Cover with plastic wrap and set in a warm place to rise, about an hour or until doubled in size.
  3. Preheat the oven to 450 and prepare a cookie sheet by lining it with parchment paper and sprinkling it with cornmeal. Mix together the filling ingredients and set aside.
  4. Once the dough has risen to twice its original size, lightly sprinkle your work space with more cornmeal. Punch the dough to release the gas and turn it out onto the cornmeal. Flatten the dough into an oblong, slightly oval shape. Mound the cheese filling on the dough, leaving a 1-inch border of dough along the edges.
  5. Fold the edges over to make a thick rim. The bread should look somewhat like a boat.
  6. Bake in a preheated oven for 12 - 15 minutes, until the bread has started to brown on the edges and the cheese is nice and melty.
  7. Serve immediately.

Friday, November 23, 2012

Thanksgiving

I spent the day alone, by choice, and on a whim, ran down to Price Chopper at 8 am and bought myself a turkey.

But let me back up a bit: See, I decided to let the kids go spend the holiday with their dad and his family for a change, since we usually go to my parents' house. This year, being busy with nursing school I opted to stay at home and not travel. At first, I was lured by the thought of staying at home in my jammies and foraging meals from last week's two-chicken roasted chicken dinner, but then I'd decided, last minute, to stay at home and make myself a traditional Thanksgiving Day meal just for myself, including all the trimmings and sides that I love. The bonus is that this meal came with none of the whining  from so-and-so and how she hates stuffing, and how the Other Kid sees orange vegetables such as butternut squash or sweet potatoes as the height of abhorrence or that they both detest potatoes  - yes, people, there are folks out there who hate potatoes, they are my children.

Thus resolved to have a dinner of all of my favorite holiday dishes, I dashed to the store for a fresh turkey. Not surprisingly, on Thanksgiving Day morning, there were only 3 fresh turkeys left, and I nicknamed them Gargantua (22 lb.), Gargantua the Elder (25 lb.) and Gargantua the Younger (19.5 lb.), the last of whom ended up in my roasting pan, stuffed with aromatics and lavishly rubbed with herbed butter.

To accompany it, I had roasted cauliflower, maple-glazed butternut squash, baked, buttered mashed potatoes, sausage and apple stuffing, sweet and spicy whole berry cranberry sauce and silky smooth turkey gravy. For dessert, a mini pecan pie.


The whole shebang:


Sausage and Apple Stuffing 

It's my family's favorite, with crumbled pork sausage, chopped apples, celery, walnuts, sauteed onion and sage. I've converted a few people with this one!


Ingredients:

  • 1 package bulk pork sausage like Jimmy Dean or Bob Evans
  • 3 tart apples, I like Granny Smith or northern spies 
  • 1 bunch of celery 
  • 1/2 cup walnuts, chopped 
  • Apple cider 
  • 1 package of stuffing cubes 
  • 1 onion 
  • Sage, fresh and dried  

Directions:
  1. Cook the sausage, drain and set aside. 
  2. Saute the chopped onions and celery in some of the sausage fat until slightly brown and soft. 
  3. In a big bowl, dump in a package of stuffing cubes (or use your own mixture of bread cubes and crumbled, day-old cornbread). 
  4. Add the chopped apples, walnuts, onions and sausage. Chop up 6 or 7 fresh sage leaves and add it to the mixture.
  5. Mix thoroughly. 
  6. Add dried sage, and black pepper. 
  7. Then add apple cider to moisten. Start with a cup and then go from there.
  8. Let sit in the refrigerator at least 4 hours, though overnight is better. 
  9. Before baking, you may have to add more cider if it's too dry. 
  10. Bake in a buttered casserole dish at 350 until done, 45 minutes or so.


Maple-Glazed Butternut Squash 


Ingredients:

  • 1 medium butternut squash
  • 1/4 cup maple syrup  
  • 1 cup water
  • 2 tablespoons butter
Directions:

  1. Peel, seed and quarter the squash, then cut into half-inch slices. 
  2. Place the slices in a large saucepan and add the maple syrup and water. 
  3. Bring to a boil, then simmer for about 15 minutes, or until the squash is tender. 
  4. Remove the squash with a slotted spoon to a serving dish and bring the cooking liquid to a boil until it has reduced and thickened. 
  5. Drizzle over the squash, top with the pats of butter and serve.


Mini Pecan Pie


For the pecan pie, you just can't go wrong with the Classic Pecan Pie from Karo Syrup. I just cut the recipe in roughly half for this smaller pie plate..

Thursday, August 2, 2012

Apple and Dulce de Leche Cake

I'm taking a short break from my extreme low-carb routine to get in some much missed baking. Although I don't have a very pronounced sweet tooth, I do love baking sweet treats for others. My kids especially love a nice moist piece of cake. The finely chopped apples in this cake help keep it moist, and the swirls of dulce de leche throughout the cake ooze out in a lovely, luscious display of sweetness. The icing is creamy and sweet, and the chopped walnuts over the top add that essential textural contrast that rounds out the cake.

Can you tell that we really really love this cake?


Apple and Dulce de Leche Cake with Dulce de Leche Icing


Ingredients:

  • 1 1/2 cups all-purpose flour 
  • 3/4 teaspoon baking powder 
  • 3/4 teaspoon baking soda 
  • 1 teaspoon ground cinnamon 
  • ¼ teaspoon ground ginger 
  • ¼ teaspoon grated nutmeg 
  • 1/2 teaspoon salt 
  • 1/2 cup butter, softened 
  • 1 cup dark brown sugar 
  • 2 eggs 
  • 1 teaspoon vanilla extract 
  • 2 cups chopped, peeled tart apples, chopped very fine 
  • 1/2 cup dulce de leche - I usually use Nestle's la Lechera canned dulce de leche
  •  Dulce de leche icing – recipe below 
  • ¼ cup chopped walnuts

Directions:

  1. Preheat the oven to 350°F. Spray a 9x9-inch square baking pan with cooking spray. 
  2. Sift together the flour, baking powder, baking soda, cinnamon, ginger, nutmeg and salt in a small bowl and set aside. 
  3. In a large mixing bowl, beat together the softened butter, brown sugar, eggs and vanilla until smooth. Gradually add the flour mixture into the wet ingredients, stirring until everything is combined, then fold in the chopped apples. 
  4. Pour about 2/3 of the batter into the baking dish and smooth the top with a spatula. Dot the dulce de leche over the batter and then spoon in the remaning batter and snooth the top with a spatula. .Take a butter knife and drag it through the batter to swirl the dulce de leche, and make sure to smooth the top of the batter when you’re finished. 
  5. Bake 25 to 30 minutes, or until a cake tester or toothpick comes out clean. Let cool completely before icing.


 Dulce de leche Icing

Ingredients:

  • 2 tablespoons butter 
  • 2 tablespoons dulce de leche 
  • Approximately 4 tablespoons heavy cream 
  • 3/4 cup confectioner’s sugar

Directions:

  1. In a small saucepan, heat butter and 2 tablespoons of heavy cream over medium until the butter starts to melt Add the dulce de leche and stir for about 30 seconds, then remove from heat and scrape into a small bowl. Continue to whisk until the mixture is completely smooth. 
  2. Add the vanilla and another tablespoon of heavy cream, mix until smooth, then add the confectioner’s sugar. Beat vigorously with a whisk or a hand mixer until smooth, adding more cream until you have the consistency you like. Drizzle and spread over bars, top with chopped walnuts and serve.


A glimpse of the lovely, moist interior with oozing dulce de leche:

Monday, July 30, 2012

Soufflé-Palooza

I've gone on a bit of a carb binge the past few days and splurged by making a variety of soufflés, sweet and savory. I'm going off a base recipe and adjusting as I go. So far, although there have been a few technical glitches here and there, these soufflés have been delicious.


Nutella souffle


Cheese soufflé


Dark chocolate soufflé


Lemon-almond soufflé


The idea behind a soufflés, both sweet and savory, is that you make a base mixture enriched with the egg yolk, then beat the whites to stiff peaks and fold it into the yolk mixture. Bake, then serve. Easy, right?

The basic recipe for a single soufflé baked in a 7-ounce/200ml ramekin calls for 1 room temperature egg, carefully separated into two bowls, so that no trace of the yolk is in the whites. Prepare the ramekin by buttering the inside liberally and then coating it with sugar for sweet soufflés, cocoa powder for dark chocolate soufflés, and bread crumbs or gated parm for savory cheese soufflés. Preheat the oven to 375.

For a savory soufflé like the cheese soufflé, you can make a standard cheese sauce from a Bechamel, then let it cool a bit and whisk in the yolk. For a single serving, I used about 1/3 cup of the cheese sauce per one yolk.

Set that aside and whip your egg white to pretty stiff peaks, adding 1/8 teaspoon of cream of tartar if you like to help stabilize the whites. Then fold in about half of the whipped whites into your yolk + cheese sauce base, and then carefully fold in the remaining whites in two more additions. Scoop into the prepared ramekin and bake for 15 minutes.

The base for a chocolate dessert soufflé generally uses a ganache of melted chocolate and butter, which is cooled a bit and then fortified with the yolk. Then proceed as with a savory soufflé by beating the egg whites with cream of tartar, but adding 2 teaspoons of sugar to them once they have reached soft peak stage and them beating them to stiff peaks before folding them into the chocolate mixture. Bake as usual.

For the lemon-almond dessert soufflé, I used a base of 1 tablespoon plain Greek yogurt, to which I added 1 tablespoon of flour, almond extract, a teaspoon or so of lemon juice, 2 teaspoons of sugar and 1/4 teaspoon of fresh lemon zest. Again, add sugar and cream of tartar to the whites, beat to stiff peaks and fold into the base mixture and bake.

I am still fooling around with the Nutella soufflé. When I made it the other day, I just mixed the egg yolk with a glob of Nutella straight from the jar and 1 tablespoon of flour. That base ended up being too thick to allow the beaten egg whites to incorporate fully, so I ended up with distinct layers of Nutella + yolk and lighter layers of almost sponge cake.

See the layers? The slightly gooey Nutella layer sank to the bottom, while the egg white layers sat mostly on top.


 It was delicious, but not quite a soufflé. The next time I make it, I may omit the flour, and melt the Nutella in a double boiler with some butter or heavy cream before adding the yolk.


Dark Chocolate Soufflé

Makes 1 serving 
Ingredients:
  • 1 egg 
  • About 1 ounce of bittersweet chocolate - I used 1.3 ounces of Scharffen berger 70% cacao baking chocolate
  • 1.5 tablespoons of salted butter 
  • 1/8 teaspoon cream of tartar 
  • 2 teaspoons sugar 
  • butter and cocoa powder for the ramekin
Directions:
  1. Set an egg out on the counter and let come to room temperature. Preheat oven to 375. Prepare ramekin by buttering it liberally and pour in a little cocoa powder and swirl it around so that the sides are all coated with the cocoa. 
  2. Separate the egg, putting the white in one bowl, the yolk in another. 
  3. Put the hunk of chocolate in a bowl over simmering water and once it starts to melt, add 1.5 tablespoons salted butter. When the chocolate and butter start to soften and melt, take the bowl off the heat and stir briskly until it is all smooth. Whisk in one egg yolk and stir until it's all mixed together. Set aside. 
  4. Add 1/8 teaspoon of cream of tartar to the egg white and beat until soft peaks form, then add the sugar and beat until the white forms firm peaks. 
  5. Gently fold the whipped white into the chocolate and yolk mixture, one third at a time until it's all incorporated. Scoop into the prepared ramekin and bake for 15 minutes. Dust with confectioner's sugar and serve immediately.


Lemon-Almond Soufflé
Ingredients:

  • 1 egg
  • 1 tablespoon plain Greek yogurt
  • 1 teaspoon fresh lemon juice
  • 2 teaspoons sugar
  • 1 tablespoon flour
  • 1/4 teaspoon fresh lemon zest
  • 1/2 teaspoon almond extract
  • 1/8 teaspoon cream of tartar
  • 1 teaspoon sugar
  • butter and sugar for the ramekin

Directions:
  1. Set an egg out on the counter and let come to room temperature. Preheat oven to 375. Prepare ramekin by buttering it liberally and pour in a little granulated sugar and swirl it around so that the sides are all coated with the sugar.
  2. Separate the egg, putting the white in one bowl, the yolk in another. 
  3. Mix together the yolk, 2 teaspoons of sugar, flour, almond extract, lemon juice and lemon zest until smooth. Set aside.
  4. Add 1/8 teaspoon of cream of tartar to the egg white and beat until soft peaks form, then add the sugar and beat until the white forms firm peaks. 
  5. Gently fold the whipped white into the yolk mixture, one third at a time until it's all incorporated. Scoop into the prepared ramekin and bake for 15 minutes. Dust with confectioner's sugar and serve immediately.


Cheese Soufflé

 Ingredients:
  • 1 tablespoon butter
  • 1 tablespoon flour
  • 1/4 cup heavy cream
  • 1/4 cup whole milk
  • 1/4 teaspoon mustard powder
  • 1/8 teaspoon grated nutmeg
  • hot sauce
  • 2.5 ounces sharp cheddar cheese, grated
  • salt
  • pepper
  • 1 egg
  • 1/8 teaspoon cream of tartar
  • butter and grated parm for the ramekin

 Directions:
  1. Set an egg out on the counter and let come to room temperature. Preheat oven to 375. Prepare ramekin by buttering it liberally and pour in a little grated parm and swirl it around so that the sides are all coated with the cheese.
  2. Melt the butter in a saucepan and add the flour, stirring until it makes a paste. Pour in the heavy cream and milk and whisk until smooth. Add the mustard powder, grated nutmeg and a few drop of hot sauce. Add 2 ounces of the shredded cheese and stir until the cheese melts and the sauce is smooth. Season to taste with salt and pepper. Remove from heat and let cool.
  3. Once sauce cools a bit, measure out about 1/3 cup of the sauce and whisk the egg yolk until smooth and set aside. You can save the rest of the sauce for other uses - augment another cheese sauce, thin with beer for a sauce for Welsh rabbit, or in a Croque Monsieur.
  4. Add 1/8 teaspoon of cream of tartar to the egg white and beat until stiff.. 
  5. Gently fold the whipped white into the cheese and yolk mixture, one third at a time until it's all incorporated. Scoop into the prepared ramekin, top with reserved 1/2 ounce of shredded cheese and bake for 15 minutes. Serve.


Nutella Soufflé recipe with my adjustments, coming soon!

Friday, July 13, 2012

Seared Sockeye Salmon with Greek-ish Vegetables

I'm still going strong with the healthy eating and working out here, though it has been awfully hot lately, which means that I have been disinclined to turn on the oven. I've been eating plenty of cooler dishes, salads, lettuce wraps, the occasional avocado mashed up with salsa, which is surprisingly addictive. Some days it's worth it to fire up a skillet for a few minutes to sear a nice piece of fish.

Sockeye salmon is not for those people who are iffy on fish. It seems to me to have a stronger, more salmon-y flavor, but still has that lovely, soft and buttery texture. I've read that it is leaner than other varieties of salmon and, as such, can dry out quicker than others, so I cooked it slightly less than I generally do with salmon.

The flavor is so wonderful, that I dressed it only with fresh lemon juice and some salt and pepper, so that I could fully enjoy the lovely fishiness of it. The bright medley of Greek-ish vegetables added a refreshing touch.


Seared Sockeye Salmon with Greek-ish Vegetables 


Ingredients:

  • sockeye salmon fillet - I had a large one, which I cut into two 4-ounce portions
  • 1 T olive oil
  • salt
  • pepper
  • lemon juice
  • cherry tomatoes
  • Persian cucumber
  • zucchini
  • feta
  • oil-cured black olives
  • olive oil
  • lemon juice


Directions:

  1. Chop the vegetables and toss them with crumbled feta, olive oil and fresh lemon juice, add salt and pepper as needed. Set aside.
  2. Season the salmon with salt and pepper.
  3. Heat 1 tablespoon of olive oil in a pan and sear the salmon skin-side down for 3 minutes, then flip and sear the other side for about 2 minutes.
  4. Squeeze some lemon juice over the top of the fish and serve with your Greek vegetables.
Related Posts with Thumbnails