Friday, December 16, 2011

Vanilla Cupcakes

I've been busy lately preparing for Christmas and a birthday. We made a gingerbread house (pictures to come), I've been knitting scarves as gifts, and I've been planning Cookie-Palooza. Also, my younger daughter's birthday was yesterday, so I made a batch of vanilla cupcakes to bring into her class AND a whipped up a batch of chocolate cupcakes for home. Next up for today, make the ice cream cake for her party this weekend.

 I'll be back with more food soon, but until then, a teaser: Best-Ever Vanilla-Bean Birthday Cupcakes.


Be back soon!

Saturday, December 10, 2011

'Tis the Season

...and today we're going to be making a gingerbread house!

I have turned to King Arthur Flour for ideas, and wouldn't you know it, they have a pdf document on Building a Gingerbread House.

A friend of mine also turned me onto this site where they demonstrated making a gingerbread castle, and I spent some time on Google looking for images for inspiration and found Gingerbread House Heaven, so we should be well-prepared in the inspiration department. Yesterday I bought a variety of candies for decorating this house - Twizzlers, Andes mints, gum drops, candy canes and many more, so we'll see what genius my kids can come up with.

Friday, December 9, 2011

Pan-Fried Cheese Grits Cakes with Lemon and Olive Oil Marinated Shrimp

I have been having fun pan-frying lately what with the Schnitzel, goat cheese rounds and catfish. With the right sized item, it really is a pretty quick and easy method of cooking. Plus, there is a real satisfying crunch and texture to something that has been breaded with Panko crumbs and then fried in really hot oil.

The catfish strips from the other day inspired me to make another southern-inspired dish. I had entered an idea for a different take on shrimp and grits in that contest using California Olive Ranch and Bob's Red Mill products. I had come across this delicious-looking recipe from Food & Wine for shrimp marinated in lemon and olive oil that I thought would be nice with cheese grits cakes.


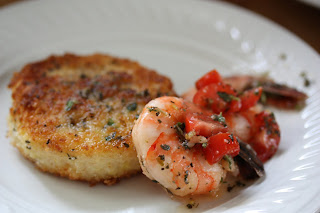
Pan-Fried Cheese Grits Cakes with Lemon and Olive Oil Marinated Shrimp


Serves 2 as an appetizer


Ingredients:

  • 4 large cooked shrimp
  • lemon from half a lemon
  • 1/4 cup olive oil
  • 1/2 teaspoon dried basil
  • 2 teaspoons fresh thyme
  • salt and pepper
  • 1/4 cup stone ground corn grits
  • 1 cup water
  • 1 teaspoon Kosher salt
  • 1 teaspoon Old Bay
  • 1/2 - 1 cup extra sharp cheddar, shredded
  • flour
  • 1 egg, beaten
  • Panko breadcrumbs
  • soft breadcrumbs
  • 1 teaspoon chopped fresh thyme
  • 1/2 teaspoon dried basil


Directions:

  1. Make the cheese grits by bringing 1 cup of lightly salted water to boil and add the corn grits, lowering the heat to low. Stir frequently to be sure that it doesn't stick. Careful, like oatmeal, bubbles might burst out and splatter you with wicked-hot starchy grain. 
  2. After about 10 minutes, add 1/2 teaspoon of Old Bay. Stir well and let cook another 15 - 20 minutes.
  3. Once it has cooked through and is the thickness you like, add the shredded extra-sharp cheddar, starting with 1/2 cup and adding up to 1 cup to suit your taste - I used about 3/4 cup. Stir well to let the cheese melt, then remove from heat. 
  4. Place a long piece of waxed paper in a plastic container so that the ends hang out of the sides - this will let you remove the grits easily when they've set up - pour the grits into the container and out in the fridge for at least 4 hours.
  5. Mix together the cooked shrimp in the olive oil, lemon juice, thyme, basil and salt and pepper. Let marinate in the fridge for at least an hour.
  6. When you are ready to make the grits cakes, set up 4 bowls, one with flour, one with a beaten egg, one with panko mixed with thyme and basil, and one with soft breadcrumbs.
  7. Take the grits out of the fridge and lift them out of the container and set them on a cutting board. Cut out rounds using a a biscuit cutter and dredge them in flour, dip in beaten egg, and then passing through the breadcrumbs, first the panko and then the soft crumbs, to fill in the gaps that the panko crumbs missed.
  8. Fry in hot peanut oil until golden brown on both sides, drain on a paper towel and then serve with the marinated shrimp.


A closer look...


Wednesday, December 7, 2011

Fried Goat Cheese on Roasted Golden Beet and Savory Cracker

We do love our appetizers around here, often making a meal out of a choice of finger foods, dips and spreads with fresh bread. In addition to the usual array of cheeses, I like to have a more elaborate or interesting choice or two to allow me to test out new ideas. Plus, it's always a good way to get the kids to try out new things.

I especially love the combination of beets and goat cheese. The goat cheese & roasted beet amuse bouche is the most-viewed blog entry here, and for good reason: the roasted beets offer a wonderful sweetness, which is the perfect foil for the smooth and tangy goat cheese. Breading and pan-frying the goat cheese rounds seems to bring out the creaminess of the cheese as well as adding a wonderful new texture. I put it on a savory cracker to make it a little easier to eat as a finger food.

The end results provides a rich combination of smooth and crunchy, creamy and tangy, sweet and savory. Not bad for an appetizer.


Fried Goat Cheese on Roasted Golden Beet and Savory Cracker


Ingredients:
  • 1 golden beet
  • olive oil
  • salt
  • pepper
  • log of herbed goat cheese
  • flour
  • egg
  • panko bread crumbs
  • fresh thyme, chopped
  • soft bread crumbs
  • peanut oil
  • savory cracker, wasa bread or some other thin and crisp flatbread or cracker

Directions:
  1. Roast the beet: Preheat the oven to 400 F. Pour a thin layer of olive oil in a bowl. 
  2. Wash and scrub the beet carefully, then roll it in the oil until it is all coated. Sprinkle some freshly cracked black pepper and sea salt over it and then place it on a sheet of aluminum foil and seal it up into a packet. 
  3. Place into a roasting pan and roast for 45 minutes. 
  4. Take out and let cool. Slip off the skin and then slice into 1/2 inch slices.
  1. Make the pan-fried goat cheese rounds: Grab four shallow bowls, pie tins or plates. Pour out about 3/4 cup of flour on one, the beaten egg on the middle plate, the panko bread crumbs mixed with fresh thyme leaves on the third, and unseasoned soft bread crumb on the fourth.  
  2. Slice the goat cheese into 3/4 inch rounds and then squish them down slightly until the diameter of the round almost matches the diameter of the beet slices. 
  3. Working one at a time, dredge the goat cheese rounds through the flour until it is all coated, then dip into the beaten egg, making sure to let the excess egg drip back into the plate. Then press into the panko and thyme on both sides, then dipping it into the soft breadcrumbs to cover what the panko missed.
  4. Heat some peanut oil over medium-high heat in a skillet. Once the oil starts to shimmer, carefully lower the goat cheese rounds into the oil and fry until both sides are golden brown, once per side is best. Remove to a plate lined with paper towels to drain.
  5. Place a slice of the roasted beet on a cracker and top with a goat cheese round and serve.


A closer look at the melty cheese....


Tuesday, December 6, 2011

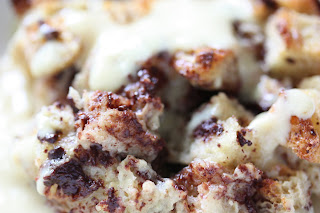
Bourboned-up Eggnog Bread Pudding

'Tis the holiday season.

Although for some people that may mean the joy and fellowship of gift-giving and shared meals, for other people that may mean stress and insanity associated with gift-giving and shared meals. For still others, it is a mixed bag of both joy intertwined with stress, fellowship commingling with insanity.

It's no wonder so many people spike their eggnog during the month of December.

A friend of mine talked about a bourbon-spiked eggnog he made and I read something recently about an eggnog bread pudding based on this White and Dark Chocolate Bread Pudding from Eupicurious, and my ears perked right up. All signs seemed to indicate that I would smash the two together in some sinful way.

As luck would have it, I had just bought a quart of eggnog the other day on impulse, and just yesterday when I was rummaging through the fridge, I came across a bag of the bits and pieces of a few recently purchased, but never finished, baguettes. Leftover bread like that usually gets stuffed into a ziplock bag and stored in the freezer for future use as bread crumbs, but for some reason, these baguettes had escaped to the back of the fridge until Sunday, when I sliced off the crusts and let the baguettes fulfill their life's ambition of being mixed with chopped chocolate, drowned in egg, bourbon and cream, and then baked to golden-brown deliciousness.

I didn't stop there. I made a custardy sauce of eggnog, cream and bourbon as the final touch.

Let me tell you, it makes the stress and insanity of the season just a wee bit more bearable.


Bourboned-up Eggnog Bread Pudding


Serves 2 generously or 4 or even 6 judiciously - don't even attempt to eat the whole thing by yourself 

Ingredients:

For the sauce:
  • ½ cup eggnog
  • splash of heavy cream - 2 or 3 tablespoons
  • generous 2 tablespoons bourbon - it may have been closer to 3 or even 4 tablespoons 
  • 1 tablespoon sugar
  • splash of vanilla
  • touch of nutmeg
  • ½ teaspoon cornstarch
  • ½ teaspoon water
For the pudding:
  • 3½ cups leftover French bread cut into 1 inch cubes, crusts cut off - stale is ok, moldy is not
  • 1½ oz. bittersweet chocolate, chopped - I used Scharffenberger's 70% cacao bittersweet chocolate
  • 1 oz. good quality white chocolate, chopped
  • 1 egg
  • 2 tablespoons sugar
  • ½ cup heavy cream
  • ¼ cup egg nog
  • 1/8 cup milk
  • 1/8 cup bourbon
  • 1/8 teaspoon nutmeg
Directions:
  1. Make the sauce by placing the eggnog, cream, sugar, vanilla, nutmeg and bourbon in a saucepan and heat to a gentle boil.

  2. Make a slurry of the cornstarch and water, whisking it well until it is smooth and then add it to the eggnog-cream mixture. Keep it bubbling gently over medium to low heat, stirring constantly until it thickens, about 3 minutes. Take it off the heat, stir in the nutmeg and cool. Refrigerate until needed.

  3. For the bread pudding, I like to go beyond even day-old bread and use stale French bread. Very simply, I cut off the crusts and then cut the bread into 1 inch cubes. Toss that into a large bowl.

  4. I was feeling lazy, so I chopped the chocolates in the food processor. It made a hell of a racket, but it was great - I had chunks of chocolate as well as "chocolate dust." Add the grated/chopped/pulverized chocolate to the bread cubes.

  5. Beat together the egg, sugar and vanilla until frothy, then add the cream, eggnog, milk, nutmeg and bourbon, whisking well. Pour the liquid over the bread and chocolate and stir well. Let it soak for 30 minutes, stirring occasionally to make sure that it all soaks evenly.

  6. Preheat the oven to 350 F. Find a smallish casserole dish. I used an oven-safe 5 x 7 inch stoneware dish for this amount of bread pudding. Give it a good spray with cooking spray and dump in the soaked bread pudding mixture. Sprinkle a bit of brown sugar over the top if you like, and then bake for 30 minutes or until the edges of the bread cubes are brown and the custard is set.

  7. Take out and let cool 10 minutes, then serve warm with the eggnog sauce spooned over it.


A closer look...


Monday, December 5, 2011

Fried Catfish Strips

A Syracuse, NY favorite, Dinosaur Bar-B-Que has a menu that will have you drooling all over yourself  before you even get to the entrees. I could happily make a meal of the appetizers and sides alone. Their Cuban-style black beans and rice are absolutely sublime, there is no other word for it, and the cucumber and tomato salad adds that note of freshness that rounds out whatever big heavy hunk o' smoked meat you may have on your plate.

If I were to make a meal of the appetizers, I'd have to start with their Fried Green Tomatoes, really the best use for green tomatoes that I know of. The contrast of the crispy cornmeal coating and the still-firm and green tomato are as perfect a combination as malt vinegar and salt are for fries. Every time I bite into one, I get that zing at the back and sides of my throat. Love that.

Next up would be the drunken spicy shrimp boil, which features one of my favorite spice mixtures, Old Bay. You could put Old Bay on just about anything and I'd probably eat it. Well, except for offal. I doubt anything could dress up tongue or kidneys so that I'd find them appetizing.

Finally, my favorite app, catfish strips. I would gladly eat these every day. True story, I'd never had catfish before my fist visit to Dinosaur. I guess that the pre-seasoned catfish fillets I saw in the market never looked appealing to me. Well shame on me. Catfish is wonderful, especially soaked in buttermilk, crusted with cornmeal and fried.

This is not, as far as I know, the exact recipe they use at Dinosaur*, but it is pretty easy and yields delicious, crispy and nicely seasoned catfish strips, perfect for a snack, a sandwich or a meal.


Fried Catfish Strips


Ingredients:
  • ½ lb. fillet of catfish, cut into 4 strips
  • 1 - 1½ cups buttermilk
  • ½ cup cornmeal
  • 1¼ cup all-purpose flour
  • 1 tablespoon Old Bay
  • peanut oil for frying
Directions:
  1. Put the catfish strips in a plastic container with a lid and pour in enough buttermilk to completely cover them. Cover securely and put in the fridge to marinate for 2 hours.
  2. Once the fish has finished marinating, mix together the cornmeal, flour and Old Bay in a shallow dish or pie plate. Take the fish out of the buttermilk and dredge in the cornmeal mixture until thoroughly covered. repeat with all catfish strips and set aside on a plate.
  3. Heat a 1/4 inch of oil in a skillet. When the oil starts to shimmer, carefully place each piece of fish into the oil and cook until light golden brown, about 4  - 5 minutes, then flip until the other side is also a nice light golden brown. Turn again and let the fish cook on each side another few minutes, letting the crust develop a deeper golden brown color. Whether or not the fish is cooked through depends on how thick the pieces are. Don't be afraid to cut into it to check if you aren't sure. The fish interior should flake with a fork and have lost its translucence. All told, my fish cooked for about 12 minutes total.
  4. Take out and let rest on a plate lined with paper towels to absorb some of the extra grease, then serve with your favorite tartar sauce. I like a simple mix of mayonnaise, sriracha and Old Bay.

Notes:

Sunday, December 4, 2011

Semolina, Olive and Rosemary Focaccia

Yesterday I came across a contest sponsored by California Olive Ranch and Bob's Red Mill for recipes featuring their products - or so I thought when I first glanced it over. Call me bad, I have a problem with skimming. I checked out a variety of recipes through Google for inspiration, but didn't find exactly what I wanted, so I thought, "Well hell, I'll improvise."

So I hustled my ass right into the kitchen, worked some of that culinary alchemy that bakers live for, and a few hours later, I had this: Semolina, Olive and Rosemary Focaccia.

When I sat back down at my computer to enter the contest, munching on the delicious focaccia I might add, I saw that they only wanted ideas for combining their products, not actual recipes.

*dope slap*

What the hell, I entered anyway, and as a bonus, I have a very lovely recipe for a savory focaccia made from semolina.

Semolina, Olive and Rosemary Focaccia


Ingredients:

  • 1-1/3 cups water
  • 1/3 cup olive oil
  • 2 cups bread flour
  • 1-1/2 cups Bob’s Red Mill Semolina Flour
  • 1 tablespoon vital wheat gluten
  • 1-1/2 teaspoon salt
  • 2-1/4 teaspoons active dry yeast
  • Pinch of sugar
  • ¼ cup chopped kalamata, oil-cured, green and Greek black olives, mixed
  • 2 tablespoons chopped fresh rosemary
  • 1 tablespoon sea salt or kosher salt
  • 1 tablespoon chopped fresh rosemary
For thte rosemary-infused olive oil:
  • ½ cup olive oil
  • 5 sprigs fresh rosemary

Directions:

  1. Sift together the vital wheat gluten and bread flour in a small bowl and set aside.
  2. In a large bowl, mix together the semolina and salt.
  3. Heat the water to 110 F and add the sugar and yeast. Let sit until foamy, about 5 minutes. Then make a well in the center of the semolina and pour in the proofed yeast mixture and the olive oil.
  4. Stir well to combine and add the bread flour and gluten mixture ½ cup at a time, stirring well after each addition.
  5. Once the flour has been mixed in and the dough has come together to form a rough mass, dump it out onto a floured surface and knead for 8 minutes, then fold in the chopped mixed olives and 2 tablespoons of rosemary.
  6. Continue to knead until the olives and rosemary are well incorporated and the dough is smooth and elastic, about 10 minutes, adding more flour as needed to keep the dough from sticking to your hands.
  7. Cover with a kitchen towel and let rise in a warm spot for about an hour, or until doubled in size.
  8. Make the rosemary-infused olive oil: combine ½ cup olive oil and 5 sprigs of fresh rosemary in a pan and cook over low heat for about 5 minutes, then take it off the heat, let cool and put into a container and refrigerate until needed.
  9. Preheat the oven to 400 F and prepare a 9 x 13 inch baking sheet by coating it with a thin layer of olive oil. When the dough has doubled in size, punch it down to deflate it, then press it to fit into the baking sheet, making indentations with the tips of your fingers to create dimples in the dough.
  10. Cover with a towel and let rise a second time for 45 minutes.
  11. Remove the towel, drizzle 1 tablespoon of rosemary-infused olive oil over the dough, then top with another tablespoon of chopped rosemary and sprinkle with sea salt, then bake for 20 – 25 minutes or until golden brown.
  12. Let cool on a wire rack, warm the rosemary-infused olive oil in the microwave and then serve the focaccia warm with the dipping oil.

Bread machine directions:
  1. Place the ingredients in your bread machine according to the manufacturer's specifications, set it to the dough cycle and walk away until step 8.
  2. Make the rosemary-infused olive oil: combine ½ cup olive oil and 5 sprigs of fresh rosemary in a pan and cook over low heat for about 5 minutes, then take it off the heat, let cool and put into a container and refrigerate until needed.
  3. Preheat the oven to 400 F and prepare a 9 x 13 inch baking sheet by coating it with a thin layer of olive oil. When the dough has doubled in size, punch it down to deflate it, then press it to fit into the baking sheet, making indentations with the tips of your fingers to create dimples in the dough.
  4. Cover with a towel and let rise a second time for 45 minutes.
  5. Remove the towel, drizzle 1 tablespoon of rosemary-infused olive oil over the dough, then top with another tablespoon of chopped rosemary and sprinkle with sea salt, then bake for 20 – 25 minutes or until golden brown.
  6. Let cool on a wire rack, warm the rosemary-infused olive oil in the microwave and then serve the focaccia warm with the dipping oil.

Saturday, December 3, 2011

Hasselback Potato

I'd been looking for something new to do with potatoes and came across these elegant potatoes which allegedly originated in Sweden at the Hasselbacken restaurant in Stockholm. The images I came across showed them with skins on, like mine, and skins off and garnished with a variety of toppings. The prep was rather time-consuming, but I enjoyed the visual end result and thoroughly loved the crispy edges with the soft and fluffy potato interior.

Next time, I'll try peeling them and really dousing them with olive oil and see what happens.


Hasselback Potato


Serves 1


Ingredients:
  • 1 russet potato
  • 1 clove garlic
  • 1 shallot
  • fresh thyme
  • fresh rosemary
  • salt
  • pepper
  • olive oil
  • butter
  • parmesan 
Directions:
  1. Preheat oven to 425° F
  2. Scrub the potato very clean and then with a sharp knife, slice the potato into very thin slices, being careful not to cut all the way through.
  3. Slice the garlic and shallot into paper-thin slivers and carefully put them in between the potato slices. I alternated the garlic and shallot slivers.
  4. Chop the rosemary and thyme and slip them in between the potato slices.
  5. Brush the potato with olive oil, grind some salt and pepper over the top, sprinkle a few more chopped herbs on top and bake for approximately 60 minutes or until some of the edges start to crisp up. Place small pats of butter and sprinkle some parmesan on top and serve.

Notes:

  • This recipe, though time-consuming and painstaking, is very easy to adapt to however many people you have to feed. Allow extra time for assembly though, because it can become quite an involved process.

Friday, December 2, 2011

Wienerschnitzel

I've been having serious comfort-food cravings lately, and few things are more homey or comforting for me than German food. A platter of Schnitzel or Sauerbraten with Spätzle, Rotkohl, and Kartoffelpuffer, is practically Gemütlichkeit on a plate.

The kids have been asking for a German dinner, and I got a good price on veal cutlets the other day, a package of two large cutlets which I'd cut in two for more reasonable portion size. Since there are three of us, instead of cooking up four of the small cutlets and then having all three of us fight to the death for the last schnitzel, I cooked one up for my lunch yesterday. Win-win.

Since the cutlet is pounded so thin  - technically this is called a "paillard," escalope," or "scallop" - the schnitzel cooks really quickly, so it's a good idea to have everything else ready to go in serving bowls and even already set on the table before you fry the schnitzels. Then all you have to do is just stick them on a plate and run into the dining room and eat them while they're hot. The crispy, hot breading encases the tender meat and the little bit of lemon juice and parsley add a brightness that simply makes your tongue sing. :)

Guten Appetit!

Wienerschnitzel


Ingredients:
  • veal cutlets, pounded to at least 1/4 inch thickness
  • flour
  • 1 egg, beaten
  • unseasoned, soft breadcrumbs
  • peanut oil for frying
  • lemon slices
  • chopped parsley
Directions:
  1. Set up three shallow bowls (I use pie pans) with flour in one, beaten egg in the next, and breadcrumbs in the third.
  2. Make sure your cutlets are pounded very thin- at least 1/4 inch thick, thinner if you can manage it without tearing holes in the meat. Pat the cutlets dry. 
  3. Working one cutlet at a time, dredge it in flour very well so that it is completely coated. Shake off the excess flour and dip the cutlet in the beaten egg and then pass through the bread crumbs. Don't press the crumbs down into the egg, but make sure that the entire cutlet is totally covered. Repeat with other cutlets and let them rest on a plate.
  4. Heat a good 1/4 inch of peanut oil in a large skillet to medium-high - it seems like a lot of oil, but I've found that it is the key to keeping the breading from sticking and burning. It also gives you a lovely puffed-up crust.
  5. Once the oil starts to shimmer, carefully put the cutlets into the oil. Don't crowd the pan, though. You can do this in batches of 2 cutlets at a time if you have to. 
  6. Cook for 2 - 4 minutes until the breading is golden brown on the bottom and then carefully flip over (I use tongs for this) and cook until the other side is also golden brown.
  7. You're done. The thinner cutlets cook really fast. Garnish with lemon slices and chopped parsley and serve.

Thursday, December 1, 2011

Slow-Roasted Duck Leg

For some odd reason lately, everyone seems to be talking about duck, whether it's duck confit, almost duck confit, or spicy duck empanadas with fire sauce and cilantro cream. Actually, I just got duck confit on the brain last week and then everywhere I turned, I saw people mentioning duck. I saw that Wegmans had single servings of duck legs from Maple Leaf Farms, and I wanted to cook something a little bit decadent for myself, I thought I'd go for it.

I'd read about duck confit and knew that I was not in the mood for a time-consuming, multi-stage process, so I decided to try out the slow-roasted duck recipes. I found a wide degree of temperature variation between the recipes, so I thought I'd just use the lowest setting on my oven and just wing it.

Well, hell. Duck is amazing, no joke.

I cooked it low and slow at 200° F for 3 hours and then raised the temp to 250° F for the final hour or so of cooking. When it was done, the house had that warm, cozy smell of a roasted bird, but richer, and it looked absolutely incredible. Even though everything I'd read about the duck indicated that it would release a ton of fat, I could not believe how it actually seemed to be swimming in a pond of golden fat.

See what I mean?


And yes, I did what people everywhere recommend and I saved that fat.


Apparently potatoes crisped up in duck fat are nothing short of revelatory. Well, yeah, I have to try that!

I had planned on making an orange sauce as a kind of play on combining two iconic dishes for an (Almost) Duck Confit a l'Orange, and  whipping up a puree from roasted garlic and Jerusalem artichokes, but in the end I just ate the duck by ripping all the meat off the bones as I stood in the kitchen. What blew me away about it was the texture. The meat was actually silky, and the skin crispy. Sadly, I had no duck meat left over for even a single spicy empanada. Maybe next time.


Slow-Roasted Duck Leg


Ingredients:
  • duck leg
  • 1 tablespoon kosher salt
  • thyme
  • olive oil

Directions:
  1. Set the duck on a cutting board and with the tip of a very sharp blade or a sterilized safety pin, poke holes through the layer of skin and fat. Be very careful not to piece the meat. These holes allow the fat some escape routes, which helps crisp up the skin.
  2. Rub the salt all over the duck and let sit at room temperature for a half hour.
  3. Brush off about half the salt and pat the duck dry. There will still be salt on the duck, that's just fine.
  4. Place a small coating of olive oil into a small casserole dish and set the duck inside, skin-side up. lay some sprigs of thyme on the duck.
  5. Put in a cold oven and turn the heat to your lowest setting. I was able to go to 200° F. Roast for 3 hours, then increase the heat to 250° F and roast until the internal temperature at the leg joint reaches 175° F. It took about another hour and 45 minutes to get to that temperature.
  6. Let rest for 5 minutes and then serve.

Wednesday, November 30, 2011

Sausage and Potato Breakfast Casserole

Breakfast is my favorite meal, usually because by the time I wake up, I am ravenous and anything I find to eat is going to taste delicious. It is a rare day that I skip breakfast, and I usually enjoy a substantial meal in the morning rather than a few bites of something light. I'd rather have eggs and potatoes for breakfast than something sweet and fruity, although the occasional plate of waffles and syrup suits me fine. In general, give me something packed with protein, carbs, cheese and sometimes a bit of grease, and I'm satisfied for hours.

I also love one-dish meals, with everything mixed together - easy to make, easy to serve and totally delicious. This breakfast casserole is very forgiving because you can toss in a variety of vegetables - I often include sauteed mushrooms and green pepper. You can use 2 cups of egg substitute in lieu of the whole eggs, and frozen hash browns work in a pinch if you don't happen to have any leftover baked potatoes. Use whichever sausage you like best, maple breakfast sausage, a spicy chorizo, or my favorite, a bulk pork sausage heavy on the sage.

Any way you cut it, it's a deeply satisfying dish and a great breakfast for those days you need something solid in your stomach.


Sausage and Potato Breakfast Casserole


Ingredients
  • 1/2 lb. bulk pork sausage - I like Bob Evans Savory Sage sausage
  • 1/2 medium onion, choppped
  • 2 large russet potatoes, baked*
  • 1 cup extra-sharp cheddar, shredded
  • 8 eggs**
  • 1/4 cup milk
  • pinch salt
  • pinch pepper
 Directions
  1. Preheat the oven to 350 F and grease an 8 in. x 8 in. baking dish.

  2. Brown the sausage in a large skillet until browned. Break up any large clumps of sausage. Add the chopped onion when the sausage is mostly cooked through and cook until the onion has softened and all the pink is gone from the sausage.

  3. Shred the leftover baked potatoes with a box grater into a large bowl and beat together the eggs and milk in another bowl or a measuring cup.

  4. Layer half the shredded potatoes in the baking dish, followed by half of the sausage and onion mixture and then half of the cheese and repeat with the remaining potatoes, sausage and onion and cheese.

  5. Season with salt and pepper

  6. Pour the egg-and-milk mixture evenly over the other ingredients and bake for 40 - 50 minutes or until the eggs are set. You can bake it longer if you want it to come out golden brown.

  7. Let cool 5 minutes and then serve. I added a bit of sriracha on mine.

Tuesday, November 29, 2011

Caramelized Onion and Goat Cheese Tart

I am back to creating dishes by throwing together the leftover bits and pieces from other meals. I hate throwing away perfectly good food, and do it more often than I would like, despite the fact that I have been reducing recipes several times over to yield smaller amounts.

I have been challenging myself to find new and exciting ways to repurpose leftovers. I almost always have a box of puff pastry in the freezer, and really I think that just about anything can be gussied up by wrapping it in puff pastry or presented as a tart. Slap some cheese on it, garnish with a sprinkling of fresh herbs or a drizzle of some sort of sauce and presto, you've got "something fancy for supper," which is something that my kids are really big into at the moment.

They don't have to know that those are the leftover caramelized onions from the French Onion soup 2 weeks ago that I froze. All they know is that it looks nice and tastes delicious.


Caramelized Onion and Goat Cheese Tart

Makes 2 small tarts


Ingredients
  • 1 oz. herbed goat cheese
  • 1 sheet puff pastry, thawed*
  • 1/2 cup caramelized onions
  • 2 strips bacon, cooked and crumbled
  • 1/2 cup Emmenthaler cheese, shredded
Directions:
  1. Preheat the oven to 375. Cut two 6 inch rounds out of thawed puff pastry and press them into 5 inch tart molds.

  2. Break the goat cheese into pieces and add them to the pastry shells.

  3. Divide the caramelized onions between the two shells and top with shredded Emmenthaler and crumbled bacon.

  4. Bake for 20 - 25 minutes or until the edges of the shells have puffed up and browned.

  5. Let cool 5 minutes and then serve.

Notes:

  • One sheet of puff pastry yielded 4 rounds, and some scraps, but I only made use two of the rounds for these  caramelized onion and goat cheese tarts. I used the other two rounds to make ham and cheese tarts, recipe coming soon. 
  • I will put the puff pastry scraps to use soon, most likely as a dessert or a snack. 

Wednesday, November 23, 2011

Cheese Parathas

I needed a last-minute lunch before I had to hit the road to leave for our Thanksgiving road trip, so I settled on 2 cheese parathas. Quick, easy, tasty.


Parathas are very easy to put together and cook; you'll be done before you know it. It took me longer to get my camera set up and take these pictures than it did to make and cook the parathas from start to finish.

Parathas are an unleavened whole wheat Indian flatbread, often stuffed with some sort of spiced deliciousness. My favorites are the potato-stuffed parathas (Aloo Paratha) and cheese-filled parathas (Paneer Paratha), but you can find them stuffed with cooked, mashed cauliflower, and probably a variety of other ingredients.

When I came across this video from Manjula's Kitchen, I knew I wanted to try making the parathas her way. She made it look effortless and tasty. No doubt she has years of working that tiny rolling pin under her belt, and although I did a pretty good job of filling and rolling my parathas, they were not as thin and lovely as hers are.

Like so many other things, it just takes practice.


I wanted cheese parathas, but I didn't have paneer or plain yogurt, or even cilantro. I had to fudge the filling a bit to use what I had on hand, but I think that it worked out fine.  I also reduced the recipe quite a bit to make just 2 medium-sized parathas instead of 6 larger ones.

Cheese Parathas


Makes 2 medium parathas

Ingredients:
  • 1/4 cup whole wheat flour
  • 1/8 cup all-purpose flour
  • 1/8 teaspoon of salt
  • 3/4 teaspoon oil
  • approximately 3 tablespoons lukewarm water
  • 2 tablespoons green onion, minced
  • 1 heaping tablespoon sour cream
  • 1 tablespoon chopped cheese curds
  • salt
  • pinch of granulated garlic
Directions:
  1. Sift together the salt, whole wheat flour and all-purpose flour in a bowl.
  2. Add the oil and mix briefly to moisten the flour, then pour in the water.
  3. Stir the mixture together with a fork until it forms a ball, then turn it out onto a floured surface and knead until it is smooth.
  4. Let rest for 10 minutes.
  5. In a small bowl, mix together the minced green onion, cheese curds, sour cream salt and granulated garlic until well combined.
  6. Divide the dough into two pieces and roll them out into a circle about 1/4 inch thick. Place half the filling in the center of the dough and then bring all the edges together and pinch them closed so that you have a ball of dough encasing the filling. Repeat with the second piece of dough and let them rest for 2 to 3 minutes.
  7. Carefully roll out the stuffed ball of dough to a circle about 4 inches in diameter - the first few times you do this, the filling may squeeze out a few holes. Don't worry too much about this, it will gtet better with practice.
  8. Lightly oil a griddle or a large skillet - I use my cast iron skillet or griddle and raise the heat to high. Place the rounds of bread on the hot griddle and cook until the edges begin to brown slightly, then flip them over. If the rounds puff up a bit as you're cooking, that is a very good thing.
  9. After about 3 minutes, flip them over again to check the color, they should be speckled golden brown. Cook for another 2 to 3 minutes and then place them on a plate lined with paper towel to absorb any excess oil if needed.
  10. Serve hot.

Tuesday, November 22, 2011

Carrot Cake Cupcakes

Cupcakes.

Cake. Mmmm, cake. This reminds me of my kids' all-time favorite blog post not written by their mother (they are a loyal couple of kids, I give them that):  The God of Cake. You should read it if you haven't already. The kids love it when I read it aloud, complete with funny voices and the occasional sound effect.

But anyway, back to cupcakes:


Sometimes I just get a hankering for some cake or a cupcake, but I never actually need an entire cake or 3 dozen cupcakes. Yesterday it was carrot cake that I wanted badly, but I couldn't justify baking an entire carrot cake  or 3 dozen cupcakes the day before I head out of town for Thanksgiving, so I did my best to cut my usual recipe way down. I ended up with 8 tasty little cupcake morsels, which is a good number for the 3 of us to demolish in 24 hours without feeling gluttonous.


Carrot Cake Cupcakes


Makes 8 cupcakes

Ingredients:
  • 1/2 cup all-purpose flour
  • 1/2 cup turbinado sugar (Sugar in the Raw)
  • 3/4 cup carrots, shredded 
  • heaping 1/4 teaspoon baking powder
  • heaping 1/4 teaspoon baking soda
  • 1/2 teaspoon cinnamon
  • 1/4 cup oil
  • 1 egg
  • 1/4 cup sour cream
  • 1/2 teaspoon vanilla extract
  • 1/4 cup chopped pecans
For the frosting:
  • 2 tablespoons butter, softened at room temperature
  • 2 tablespoons cream cheese softened at room temperature
  • approximately 1 cup confectioner's sugar
  • 1/2 teaspoon vanilla extract

Directions:
  1. Preheat the oven to 350 F and prepare a 8 wells of a muffin tin with cooking spray or paper liners. I used silicone cupcake baking cups sprayed with a bit of cooking spray.
  2. Sift together the flour, sugar, baking soda, baking powder and cinnamon into a large bowl.
  3. In another bowl mix together the egg, oil and sour cream until smooth, then add the vanilla extract.
  4. Add the egg mixture to the dry ingredients and mix well. Then add the grated carrot and combine.
  5. Fold in the chopped pecans and fill the muffin cups about 3/4 of the way with the muffin mixture.
  6. Bake for 20 - 25 minutes or until a tester comes out clean.
  7. Place the pan on a cookie rack to cool and then frost with cream cheese frosting when totally cool.
  8. Make the frosting by beating together the softened cream cheese and butter with a hand mixer on medium-high speed until everything is mixed together and smooth. Add the vanilla and mix well. Slowly add the confectioner's sugar a bit at a time as the mixer is running. Stop occasionally to scrape down the bowl. Mix until smooth and use immediately.


Notes:

Monday, November 21, 2011

Potatoes Romanoff

Potatoes are a common comfort-food theme for a lot of people, and make an appearance as a side dish on a lot of dinner tables:. They can be roasted, fried, mashed, boiled, and of course, baked, and they can be as humble as oven-roasted potatoes or as elegant as Potatoes Dauphinoise.

Another fancy-sounding potato side dish is my version of Potatoes Romanoff, also a quick and easy way to use up leftover baked potatoes. I almost never have leftover baked potatoes, but it is criminally easy to bake a russet and then chill it, so I don't let the lack of an extra baked potato hanging around in my fridge stop me from making this dish. Since my kids are not potato fans, I did have to scale this recipe back a bit, but it's just as easy to make this for one person as it is for 8 or 16.

Potatoes Romanoff 


Serves 4 as a reasonable side dish, or 2 generously and 1 gluttonously


Ingredients:
  • 1 large russet potato (about 11 oz.)
  • 1/4 cup shallots, minced
  • 3/4 cup extra-sharp cheddar cheese, grated (about 3 oz., moderately packed down)
  • 1/4 teaspoon dried dill
  • 1/4 teaspoon granulated garlic
  • 1 teaspoon sea salt 
  • pinch of cracked black pepper
  • 3/4 cup sour cream
  • grated cheddar
  • chopped scallions
Directions:
  1. Preheat oven to 450 F. Scrub your russet potato and pierce with a knife or fork in several spots. Wrap it in foil and set it right on the racks and bake for about an hour. Take out, unwrap and let come to room temperature and then chill in the fridge for a few hours.
  2. Preheat oven to 350 F and grease a small casserole dish or 2 small gratin dishes.
  3. Take the chilled baked potato and grate it, skin and all, with a box grater. 
  4. In a large bowl, mix together the shallots, grated potato, salt, pepper and dill, taste to adjust seasoning.
  5. Fold in the sour cream and 3/4 cup of grated cheddar and combine well.
  6. Pour the mixture into the casserole dish or gratin dishes and top with more grated cheddar and bake for 30 minutes or until the top is golden brown.
  7. Sprinkle with chopped scallions and serve.

Notes:
  • This doubles, triples and quadruples easily if you need to serve more people.

Sunday, November 20, 2011

Huffington Post Kitchen Daily

How have I not seen this page before?

Huffington Post Kitchen Daily appears to be their revamped food section, and I approve. I've only begun to dive into it, but this section on dealing with the avalanche of Thanksgiving leftovers looks terrific. It would be even better if the links to their recipes worked. Hrmm. :/

I am salivating over the image of the Sweet Potato and Caramelized Onion Shells, but alas, no recipe to be found. Let's hope that they work out the html kinks before Black Friday. All of those manic shoppers are going to need sustenance.

Friday, November 18, 2011

Loaded Baked Potato Soup

What is is about potatoes that make them so satisfying as comfort food? It's got to be the dense starchiness. It gives a sense of solid fullness, and it also turns from bland starchiness to sweet on your tongue as you eat it. Add salt to that, as many of use do with potatoes, and you get that double-whammy of sweet and salty.

Baked potatoes in particular serve as a vehicle for other lovely flavors and textures, especially creamy. The smoothness of the the fat in butter and cheese is really one of the more simple and sublime parts of enjoying foods, and the main reason I could never sustain veganism. Cheese, sour cream, butter on a baked potato - hardly makes your waistline happy, but it certainly results in happy tummy syndrome.

So, what could be more satisfying than a loaded baked potato? Making it into a soup.

This is a great recipe to deal with leftover baked potatoes - as if there could even be such a thing - or you could do what I did and bake a potato for the express purpose of making this soup. You'll thank me.


Loaded Baked Potato Soup


Ingredients:

  • 1 russet potato
  • ¾ cup leeks
  • 2 tablespoons butter
  • 1 tablespoon flour
  • ½ teaspoon salt 
  • pinch of pepper
  • ¼ teaspoon granulated garlic or garlic powder
  • ½ teaspoon dill
  • 2 cups milk
  • ½ cup shredded cheddar cheese
  • crumbled bacon
  • shredded cheddar
  • sour cream
Directions:
  1. Bake a russet potato for an hour at 400 F. Take out and let cool. Then scrape out the potato and mash up with a fork. You'll have about 1 cup. You can used a leftover baked potato if you have one lingering in your fridge.
  2. Meanwhile, saute ¾  cup leeks over olive oil or some sort of fat (I used a smidge of butter) until soft. Then add 1 heaping tablespoon of flour and stir until it's all mixed in, about 2 minutes.
  3. Add ½ t salt, a pinch of pepper, ¼ t granulated garlic or garlic powder and ½ t dill.
  4. Pour in 2 cups of milk and heat over low heat, stirring constantly, until mixture has thickened (about 10 minutes). 
  5. Puree it with a stick blender or in small batches in a regular blender if you want a uniformly smooth texture, otherwise, enjoy the rustic texture.
  6. Add ½ cup shredded cheese (I used an extra-sharp white cheddar) and stir until the cheese melts. Taste to adjust seasoning - this soup can really take a lot of salt before it's noticeable.
  7. Serve in a bowl garnished with your favorite baked potato toppings. I had shredded cheddar, crumbled bacon and sour cream.

Thursday, November 17, 2011

French Onion Soup

The main reason I made that beef stock the other day was so that I could make French Onion soup. Last year, when I made beef stock for the first time, I had been inspired by Thomas Keller's French Onion soup recipe, but life events conspired in such a way that I never did get to make the soup, and I ended up freezing the stock for use in other recipes during the year, like my (inauthentic but still delicious) spaghetti bolognese, mushroom wine sauce, pot roast, crockpot chili and beef stew.

Well, the vision of that French Onion soup never left me, and I knew that I was going to make it with the freshest batch of beef stock I could, and let me just start by saying, I felt that it was totally worth the 14 hours it took me on Monday to make the stock, plus the 5-hour caramelization time for the onions yesterday.

I think that time is of equal importance in developing the flavor. I read that "the difference between a home cook and a professional chef is that the latter has the guts to keep the dish on the fire longer to get that extra flavor." - from Chowhound

This recipe fulfills that requirement. I started prepping at 8:30 am and ate my first bowl of this soup at 4:15 pm. Well worth the wait.


I did not keep faithfully to Keller's recipe, mostly by accident (I totally forgot to add the flour), and I halved it since I would be the only one eating it and my freezer is jam-packed with various stocks and containers of other soups, but it was still far and away the best French Onion soup I've ever had.

I started with 4 lb. of sweet onions, Maya Sweets from Peru, though I'd have used vidalias if they'd been in stock. Peel the onions, cut them in half through the root and then slice thinly widthwise. Toss them into your largest dutch oven (I used my 7-quart pot) along with 1 tablespoon of olive oil and 4 tablespoons of salted butter and cook over very low heat, stirring to incorporate the melted butter and olive oil evenly. Stir occasionally, every 15 minutes or so.


As you can see, at the 1-hour mark, the volume of the onions has reduced significantly:


Still at the 1-hour mark, the onions will have released a great deal of moisture.  Keep stirring every 15 minutes or so and keep the heat low so that it does not simply brown without caramelizing or, worse yet, burn. It will seem very slow going. That's what we want.


After 2 hours, the onions have really reduced to just a fraction of what they had been and most of that moisture has evaporated and you might noticed a slight bit of coloration.


Also, after 2 hours, the onions start to get creamy.

Keep stirring every 15 minutes.


At 3 hours, oddly enough, the onions looked a lot like they did at the 2-hour mark, but the kitchen smelled much more strongly of that sweet smell of onions slow cooking. At this point, I started to check the onions more frequently, every 10 minutes, and stirring when needed.

When you stir, you'll notice a buildup of the sugary juices from the onions on the bottom of the pot. Watch that carefully, because that is where any browning and burning will begin. In my experience, that gets to be like a chain reaction, once it starts to burn, it moves VERY QUICKLY, and there is no recovering from scorched foods.


At the 3 ½ hour mark, a real change in color. There may be a few spots which are a little bit darker, which is ok, as long as you keep a watchful eye and be diligent about stirring every 10 minutes. I scraped up the film on the bottom to incorporate it back into the onions and keep it from burning. It seemed to work.


4 hours in, the onions are a deeper brown color and quite sticky and sweet. I tasted some. Even after 4 hours of cooking, they still had some bite to them, so another hour to soften is a good thing.


4 ½ hours in, a bit darker, and much stickier. At this point, for the last hour or so, I am in the kitchen prepping everything else and stirring pretty frequently and checking that it does not burn.


5 hours later... a mess of sticky, sweet, caramelized onions lounging on the bottom of the pot. Only 5 hours earlier, the onions had filled this pot to nearly the top.  How magically simple, just applying low heat and time.


For the soup, reserve ¾ cup of the caramelized onions - store the remainder in the fridge or freezer for future use.


Make the croutons: preheat the oven to 450° F. Slice up a baguette into ½ inch rounds, pour some olive oil into a bowl and add 1 teaspoon of granulated garlic and brush both sides of the bread with the garlicky oil. Place the rounds on a baking sheet lined with aluminum foil, parchment paper or a baking mat and toast for 10 minutes, then take out, flip over and bake another 5 minutes or so or until golden brown.


See? Lovely garlicky croutons.


Prepare your herb sachet by placing 2 bay leaves, 4 or 5 sprigs of fresh thyme and 8 black peppercorns into a cheesecloth bag.


Place the ¾ cup of caramelized onions in a 3-quart soup pot,* (See Notes) add 1½ quarts of beef stock, 2 teaspoons of sea salt and the herb sachet. Bring to a boil and let simmer uncovered for an hour and a half or until reduced to about 3 cups.

Season with ¼ teaspoon of sherry vinegar, though I'm betting balsamic or champagne vinegar would be nice too. Ladle into oven-proof soup bowls, top with the croutons and shredded cheese: Emmenthaler, Comte or even Gruyuere. Ideally, you'd pop this under the broiler until the cheese melts and browns, but I don't really have a broiler (long story there), so I stuck it in a 400° F oven for 10 minutes.


French Onion Soup


Ingredients:

  • 4 lb. sweet onions, sliced thinly
  • 4 tablespoons salted butter
  • 1 tablespoon olive oil
  • 1½ quarts of beef stock
  • 2 bay leaves
  • 3 - 4 sprigs fresh thyme
  • 8 black peppercorns
  • cheesecloth
  • 1 tablespoon flour * See Notes
  • 1 tablespoon sea salt
  • ¼ teaspoon of sherry vinegar
  • French baguette, sliced into ½ inch rounds
  • olive oil
  • granulated garlic
  • shredded Emmenthaler cheese


Directions:

  1. In your largest dutch oven or a large stock pot, melt the butter and olive oil and add the onions. Lower the heat to the lowest setting and stir the onions every 15 minutes.
  2. After the 1-hour mark, the onions will have reduced in volume and released a lot of moisture. Keep stirring every 15 minutes and let the onions slow-caramelize for another 4 hours, stirring every 15 minutes until they really start to change in color, then stir every 10 minutes to be sure that they don't burn.
  3. Once the onions have cooked down and caramelized, make the croutons: Preheat oven to 450° F. Pour some olive oil into a bowl and add 1 teaspoon of granulated garlic and brush both sides of the bread with the garlicky oil. Place the rounds on a baking sheet lined with aluminum foil, parchment paper or a baking mat and toast for 10 minutes, then take out, flip over and bake another 5 minutes or so or until golden brown.
  4. Place the bay leaves, thyme and peppercorns into your cheesecloth bag.
  5. Reserve ¾ cup of the caramelized onions for the soup. Keep the remainder in the fridge or freezer for other recipes or a second batch of this soup. Place the onions in a 3-quart soup pot over medium heat, add the flour and and stir until incorporated. Add the beef stock, salt and sachet, bring to a  boil and then reduce heat to low and let simmer uncovered for an hour and a half or until reduced to about 3 cups.
  6. Season to taste with more salt and pepper and add  ¼ teaspoon of sherry vinegar, and ladle into oven-proof bowls. Top with croutons and shredded cheese and stick under the broiler until browned and bubbly.


Notes:

  • Keller's recipe calls for a bit of flour stirred in with the caramelized onions before the addition of the stock but I just completely forgot about it. I was still pleased with the end result and I am not usually a huge fan of flour-thickened soups anyway.

Wednesday, November 16, 2011

Beef Stock

Here is the end result of the other day's 14-hour beef stock process.


All told, I got just over 1 gallon of stock: 9 ½ quarts of deep, rich brown beef stock.

I froze 2 quarts of stock in ice cube trays and put the cubes into labeled freezer bags so they'd be ready to go, and yesterday I reduced 1 quart of stock to about 1 ½ cups of a concentrated stock and froze those in ice cube trays as well.

I still have 6 ½ quarts in the fridge ready to be used, and I plan on putting at least 1 ¾ quarts of it to use today as I attempt Thomas Keller's French Onion soup.  His book, Bouchon, is on my Christmas wish list, and just might be the gift I gift myself this year. :)

Tuesday, November 15, 2011

Peanut Butter and Chocolate Blondies

Brownies may be my favorite sort of cookie, but sometimes I have a hankering for the non-chocolate, blondie version. They are great with butterscotch chips, but they are phenomenal with peanut butter and chocolate, a time-honored flavor combination that never lets me down.

These come together really quickly and I hardly ever wait for them to cool before I dive into the pan.


Peanut Butter and Chocolate Blondies


Ingredients:

  • 1¼ cups all-purpose flour
  • ½ teaspoon baking soda
  • ½ teaspoon salt
  • ½cup butter, softened
  • ½ cup granulated sugar
  • ½ cup firmly packed brown sugar
  • 1 large egg
  • ½ teaspoon vanilla extract
  • 1 cup peanut butter chips
  • ½ cup chocolate chips (I used dark chocolate)

Directions:

  1. Preheat oven to 350°F (175°C). Grease a 9-inch square baking pan.
  2. Sift together flour, baking soda and salt, whisking well to break up any clumps and set aside.
  3. In a large bowl, with an electric mixer at medium speed, cream together the butter with sugar and brown sugar until fluffy.
  4. Add the egg and vanilla and beat well. Gradually add dry ingredients, beating on low speed until thoroughly combined.
  5. Fold in the chips and make sure they're all well incorporated into the dough.
  6. Spread the dough in prepared baking pan and bake for 15 to 20 minutes, or until set. 
  7. Cool on wire rack and then cut into bars.

Monday, November 14, 2011

Making Beef Stock

I first made beef stock last winter and was amazed by the difference between homemade stock and stock from a cube or a granule. There is no doubt that this is a time-intensive endeavor requiring maintenance as you skim the impurities from the surface of the stock, but I think that it is worth the time and effort.

I was inspired by this video and make stock basically the same way, with a few of my own changes.


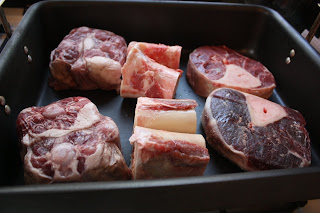
I started with 8 lb. of bones and meat: 4 lb. of oxtails on the left, 2 lb. of beef marrow bones in the middle, and 2 lb. of beef shanks on the right.

Preheat in the oven to 450 F.


Cover the bones with 12 oz. of tomato paste.


Add 2 large carrots on top of the beef and then roast for an hour.


Meanwhile, grab your largest stock pot. I use my monster 20-quart pot for beef stock.


Heat some olive oil and sweat down onions, leeks, carrots and celery. I used 2 large onion, chopped roughly, about 2 cups of leeks, both the white and the green parts, 2 more large carrots, roughly chopped, and a large bunch of celery, chopped.

Cook until it starts to soften.


Then add 2 bay leaves, a large amount of parsley, fresh thyme and 2 large roma tomatoes, quartered.


See the lovely roasted bones?


Take the roasted bones, carrots and tomato paste and add it all to the stock pot.


Deglaze the roasting pan with some white wine and a bit of water and and scrape up all of the lovely fond at the bottom and then add it to the stock pot as well.


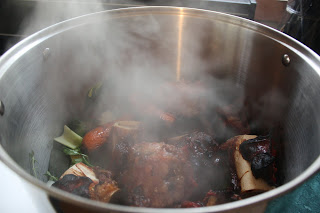
Add enough cold water to cover the everything in the pot and bring up to between 180 and 200 F, and let simmer uncovered for 8 - 12 hours.


As the stock simmers, skim off any fat, scum and impurities.


In about 10 hours, the stock will be finished, at which point I'll strain it and cool it in an ice bath and then freeze in ice cube trays. Stay tuned...
Related Posts with Thumbnails