Showing posts with label sweet. Show all posts

Sunday, October 2, 2011

Cranberry-Almond Scones

The other day, someone asked me for a scone recipe that didn't require cream. Oddly enough, I had one, so I sent it along to her and that was that.


Or so I thought.


Ever since the word "scone" had popped in my head, I couldn't stop thinking about how wonderful they are straight from the oven, about that delectable texture, and in the case of this particular recipe, the lovely combination of almond and cranberry.

So I caved, and this morning I baked a batch. True to form though, I finagled with the usual recipe which calls for a standard 2 cups of flour and made some crazy substitutions. The oringal recipe also calls for you to grate a stick of frozen butter into the dry ingredients with a box grater, but I had discovered mid-recipe that my box grater was in the dishwasher, in the middle of a cleaning cycle.

Time to improvise!

I tried tossing the dry ingredients and the frozen butter chunks (butter is very hard to cut when rock-solid, let me tell you) into my food processor, but that frozen butter did little more than whirl around and make disturbing "I am so going to break your food processor" noises, so I quickly put an end to that.

I ended up dumping the flour mixture and butter back into the bowl they'd originally been in and just walked away for about 15 minutes to let the butter soften. Then I worked it in by hand.

Moral of the story: Always make sure that absolutely everything you need is on hand BEFORE you start cooking, but be ready to improvise if you have to. :)

All's well that ends well though, these scones are almost perfumed with the scent of almond and have a delectable texture, not hard at all. I had a funny thought while I was making them. I've had some rather hard, rock-like scones in the past, and I got to giggling when I remembered an English professor of mine telling us about the Stone of Scone - and I swear he pronounced it like "Stane of Skoon," - and I got to laughing thinking that if these turned out rock-hard, I could call them the Skoons of Stane.

Click for crickets

Ok, ok, I might be the only person to find that amusing, but I liked the pun. The stone of scone (stone of destiny/coronation rock) versus the scone of stone (inedible baked good).

These scones were neither rock-hard nor inedible, and they are very, very easy to make, even with a mad dash around the kitchen looking for the box grater.


Cranberry-Almond Scones


Ingredients:
  • 1 cup All-Purpose flour
  • 1/2 cup almond meal
  • 1/2 cup oat flour
  • 1 tablespoon flax seed meal
  • 1/4 cup chopped almonds
  • 1/3 cup dark brown sugar
  • 1 teaspoon baking powder
  • 1/2 teaspoon salt
  • 1/4 teaspoon baking soda
  • 8 T butter, cold and cut into 1/2-inch cubes
  • 1/2 cup dried cranberries
  • 1/2 teaspoon almond extract
  • 1/2 cup sour cream
  • 1 egg
  • Turbinado sugar

Directions:
  1. Preheat the oven to 400 F and line a baking sheet with parchment paper or a Silpat baking mat.
  2. In a large bowl, mix together the All-Purpose flour, almond meal, oat flour, flax seed meal, chopped almonds, baking powder and salt until well-combined. 
  3. Work the butter into the flour mixture with your fingers or a pastry cutter until the mixture resembles coarse bread crumbs.
  4. Stir in the dried cranberries and give a quick mix.
  5. Whisk together the egg, almond extract and sour cream until smooth, then pour it into the dry ingredients and mix thoroughly. Work it together into a rough ball and then turn out onto a long piece of waxed paper coated with flour. This dough is going to feel like a sticky mess - don't worry, it will come out right.
  6. Flour the top of the the dough and fold over the wax paper onto the top of it and gently smoosh the dough down until you've shaped it into a 1-inch high rectangle. 
  7. Peel the waxed paper back off the dough and with a biscuit cutter, cut out rounds or cut the dough into triangles with a knife. 
  8. Place the scones on the baking sheet, sprinkle lightly with turbinado sugar and bake for 15-17 minutes or until they start to turn golden-brown. 
  9. Let cool 5 minutes, and then serve warm.


Monday, November 15, 2010

Almond Pastries

I had a hankering for a cheese danish the other night. Well no, first it was a craving for almond-filled croissants, croissants aux amandes, but then later on, I'd moved on to drooling after a good old cheese danish when the thought hit me: Why not combine them?!

So, practically the first thing I did this morning was take out my box of puff pastry from the freezer and let that last sheet of pastry thaw out. Then I took a look at what I had in the fridge that could simulate a cheese danish filling. A little cream cheese, confectioner's sugar, some ricotta, almond paste and an egg yolk formed the base of it. I added orange zest and almond extract to round it out, and finished it off with a lovely egg wash to give it a sheen.

Going into the oven, they were kind of a mess, I'll be honest. The crimped-together edges were not the least bit pretty and I wondered if I'd have anything photograph-worthy. I thought if the filling turned out ok, I could  troubleshoot the presentation the next time I made them, but to my surprise, when they came out of the oven, they were gorgeous, attractively puffed-up and golden brown.

The final test, then, would be how they tasted.

Sublime. The texture was just right, smooth and creamy, and the orange and almond flavors worked nicely with one another. It is strongly reminiscent of almond without being too strong.


Almond pastry


Ingredients
  • 3 ounces cream cheese, at room temperature
  • 1/4 cup confectioner's sugar
  • 1 egg yolk, at room temperature
  • 1 T ricotta cheese
  • 1 1/2 T almond paste
  • 1/2 t pure almond extract
  • 2 t grated orange zest 
  • 1 sheet  frozen puff pastry, defrosted
  • 1 egg beaten, for egg wash
Directions
  1. Preheat the oven to 400 degrees F. Line a baking sheet with parchment paper.
  2. Unfold 1 sheet of puff pastry onto a lightly floured surface and roll it out with a rolling pin until it's a 12 by 8-inch rectangle. 
  3. Place the cream cheese and confectioner's sugar in the bowl of a stand mixer fitted with a paddle attachment and cream them together on low speed until smooth.
  4. With the mixer still on low, add the ricotta and crumble in the almond paste and let the mixer combine them well.
  5. Then add the almond extract, orange zest and egg yolk and mix on low speed until just combined.
  6. Cut the sheet of puff pastry into eight rectangles with a sharp knife.
  7. Place one heaping tablespoon of cheese filling into the middle of 4 of the rectangles.
  8. Brush the border of each pastry with egg wash and then cover it with a free pastry rectangle, pinching the edges together so that they stick together.
  9. Brush the top of the pastries with the egg wash.
  10. Place the pastries on the sheet pan.
  11. Bake the pastries for about 20 minutes, until puffed and brown. Serve warm.

Saturday, November 13, 2010

Pumpkin Pancake Puffs

I had some leftover pumpkin puree from when I made the gingerbread. It was not enough for a pie or another batch of gingerbread, and I didn't want to throw it out, so I thought it was time for another one of my "just throw some shit together and see what happens" types of recipes. In addition to the pumpkin puree, I had several items loitering around the kitchen I wanted to use up. Best of all, since I used packaged pancake mix, I get bonus Sandra Lee points as well.

These were pretty good. They're not really a muffin, which is denser, so I hesitate to call them pumpkin muffins. They were gone within 15 minutes of being pulled out of the oven, so I'll work out the kinks of the recipe for next time.

If I were totally depraved, I would deep-fry the batter as a sort of knock-off of Denny's Pancake Puppies, but I am not depraved. Also, I don't have a deep fryer. So, there ya go.

Pumpkin Pancake Puffs


Ingredients:
  • 1 1/2 cups pancake mix ( I often have New Hope Mills)
  • 2 eggs
  • 1 cup Greek yogurt, sour cream or buttermilk
  • 1/2 cup pumpkin puree
  • 1/4 cup brown sugar
  • 1 t cinnamon
  • cinnamon sugar
Directions:
  1. Preheat the oven to 350.
  2. In a large bowl, mix together the pumpkin puree, brown sugar and cinnamon.
  3. Add the yogurt and stir well.
  4. Add the beaten eggs, mixing well to combine.
  5. Add the pancake mix and stir well until it is all combined.
  6. Grease mini muffin tins and drop in the batter.
  7. Bake for 20 minutes until the tops are lightly golden and a cake tester come out clean.
  8. Dust with cinnamon sugar and eat warm.
Notes:
  • These stuck to the muffin tins like hell. I don't know if I should butter and flour them next time or use muffin liners.
  • These were very tangy- possibly because I used Greek yogurt. I might add a bit more brown sugar to the pumpkin puree next time, or use cream instead of the yogurt, though I actually liked the tanginess.
  • I also might add bit more baking soda for more lift.

Sunday, October 3, 2010

Puff Pastry Swirls, Two Ways

Chocolate Hazelnut Swirls

Here is another one of my Sandra Lee-esque recipes using items which are ready-made. It's easy to assemble and the end result is tastier than an almost-ready-made tidbit ought to be. I got inspired to make this after recent Nutella adventures. My kids have discovered its wonderfully nutty, chocolatey goodness and have declared it to be the Best Thing EVER!


Ingredients:
  • 1 sheet puff pastry
  • Nutella
  • chopped hazelnuts
  • melted butter

Directions:
  1. Thaw 1 sheet of frozen puff pastry on the counter for an hour. Preheat the oven to 375.

  2. Unfold it onto a sheet of parchment paper. If the pastry has cracked and separated where it had been folded, press the pieces together gently with your fingers. Flip the pastry over and press the seams on the other side.

  3. Spread Nutella all over the pastry, leaving about 1/2 border around the edges.

  4. Sprinkle the chopped hazelnuts on the Nutella. Press them in firmly.

  5. Roll the pastry into a jelly roll, and slice into 10 pieces.

  6. Place them on a cookie sheet lined with parchment paper. Brush the tops of the pastry with melted butter.

  7. Bake for 17 minutes or until the tops are nicely browned.


To balance out the rich sweetness of the chocolate swirls - and they are rich, sweet and delightfully chocolatey - I decided to make something savory with the remaining sheet of puff pastry. I saw many recipes for puff pastry appetizers that used spinach, but I wanted something different. I thought maybe I could use a bruschetta spread from artichoke hearts and cheese as the filling to make a nice savory treat.

I was right. These were amazing.


Savory Artichoke Cheese Swirls


Ingredients:
  • 1 sheet puff pastry
  • 1 small jar marinated artichoke hearts (6 oz), drained
  • 1 T minced shallot
  • 1/2 cup shredded pecorino romano
  • 1 garlic clove, minced
  • 1 T sun-dried tomato, minced
  • 1 T mayonnaise
  • 2 T shredded mozzarella
  • olive oil

Directions:
  1. Thaw 1 sheet of frozen puff pastry on the counter for an hour. Preheat the oven to 375.

  2. Unfold it onto a sheet of parchment paper. If the pastry has cracked and separated where it had been folded, press the pieces together gently with your fingers. Flip the pastry over and press the seams on the other side.
  3. Chop the artichoke hearts and add the minced shallot, garlic and sun-dried tomato to the mixture.

  4. Add the mayo and the cheese. Mix well.

  5. Spread the mixture all over the puff pastry, leaving 1/2 inch border around the edges.

  6. Roll the pastry into a jelly roll, and slice into 10 pieces.

  7. Place them on a cookie sheet lined with parchment paper. Brush the tops of the pastry with olive oil.

  8. Bake for 17 minutes or until the tops are nicely browned.

Notes:
  • I could have baked these longer and let the pastry get more brown, but I had forgotten to set the timer (doofus) and honestly, they smelled too incredible and I pulled the out early. They were delicious even if they weren't very brown on top.

Saturday, November 21, 2009

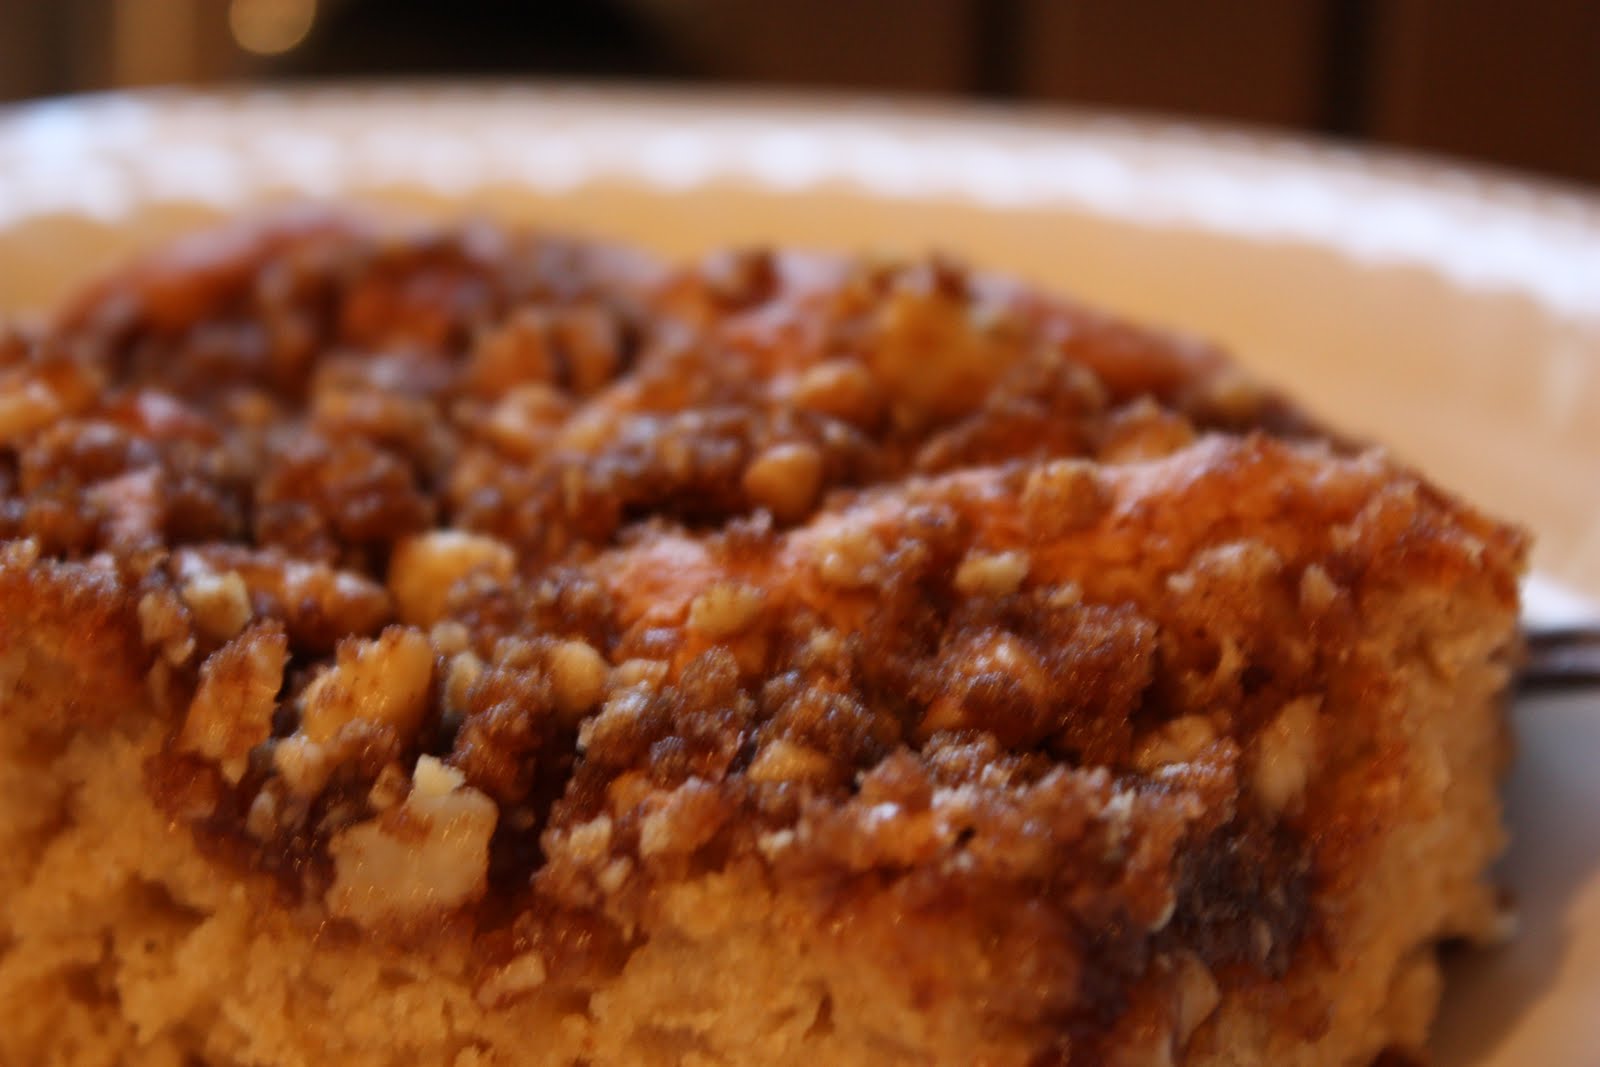
Who Wants Coffee Cake?

I am not a sweets for breakfast girl. I have never really liked cold cereal, although occasionally I'll have some granola with yogurt. The smell of sodden Cheerios has always turned my stomach, and I never relished digging down through a bowl of bobbing sugar-nuggets to get to the unnaturally-colored, cloyingly sweet dregs of milk and dissolved cereal.

When faced with a choice of pancakes, french toast, waffles or an omelette with side of hash browns and some greasy breakfast pork-item, I'll always opt for the eggs, potatoes and meat. I make pancakes and crepes for the kids because they like them. I'd rather have savory crepes with a creamy mushroom and herb filling than Natalie's preferred jam-and-yogurt.

My cinnamon buns are a once-a-year treat on Christmas morning, a well-loved tradition not to be ignored, even by me; a summertime stint working in two donut shops 20 years ago has left me with little craving for weekly donuts; but every now and then I am overcome with a craving for coffee cake.

When I mentioned to the girls (early) this morning that I was considering making a coffee cake for breakfast, Lucy had a meltdown. "Nooooooooooooo!" she wailed. "No. Coffee. Cake!!" After a bit of prodding, I realized she thought that it was a cake made from coffee. When I told her that it was just called that because it was a sweet breakfast cake that people could eat with their morning coffee, and that she wasn't obligated to drink any coffee at all in order to have some cake, she relented.

Now, I'm at the end of my usual grocery cycle, and since I'll be traveling for the holiday this week, I did a huge shopping trip recently where I restocked the pantry of several staples; I still have some items stocked away in the freezer. I am tempted to stretch it out and see what meals I can scrape together from my pantry. I love the end of a long grocery cycle - I have to be very creative about what to toss together to make a nice meal. Some of my favorite recipes have come about under those conditions!

Some friends and I were chatting about sharing our "Sandra Lee recipes" you know, those not-quite-from-scratch, shortcut recipes you may rely on but be too embarrassed to cop to using?

One of my favorites is biscuit mix sour cream coffee cake, but I happened to be right out of Bisquick. I did have a bag of New Hope Mills pancake mix, because I don't always feel like making my own batter from scratch. Sue me.

The recipe also calls for sour cream, which I rarely have on hand unless nachos are on the menu. I did have vanilla yogurt and I thought, "Why not substitute it? The yogurt is sour, like the sour cream, and the acid would probably work with the baking powder in the mix as a leavening agent. Besides which, the pancake mix was a buttermilk mix, so there ought to be some acidity already in the bag.

I opted to use brown sugar instead of white (I was out of the regular granulated sugar), substituted chopped nuts instead of flour in the streusel topping, and presto! 25 minutes later, I had a lovely, cinnamony coffee cake which both girls devoured, warm. It was the perfect accompaniment to my coffee this morning.


Cinnamon Coffee Cake

Ingredients:
  • 1 1/2 cups pancake mix
  • 1/2 cup sugar -I used brown sugar because I was out of the white
  • 1 egg
  • 3/4 cup vanilla yogurt (or sour cream)
  • 1/2 teaspoon vanilla extract

For the streusel:
  • 1/2 cup packed light brown sugar
  • 1/2 cup chopped walnuts
  • 3 tablespoons butter, melted
  • 1 1/2 teaspoons cinnamon

Directions:

  1. Preheat the oven to 350. Spray an 8-inch square baking dish with cooking spray, or grease it with shortening or butter.
  2. In a large mixing bowl, sift together the flour and sugar.
  3. Add the yogurt, egg and vanilla extract and mix well. Spread batter into a greased 8-inch square pan.
  4. Mix together the chopped nuts, brown sugar, and cinnamon in a medium-sized bowl. add the melted butter and mix well until crumbly.
  5. Sprinkle topping evenly over the top of the cake batter.
  6. Bake for 25 minutes or until a tester inserted into the center of the cake comes out clean.
  7. Let cool for 10 minutes before serving.
Notes:
  • This was tasty and fragrant, but it did not have the fine, moist, delicate crumb of some other coffee cake recipes I've tried.
  • I don't know if the brown sugar in the cake was at fault or if I should have used more yogurt or added some butter.
  • Instead of 3/4 cup, I might try 1 cup of yogurt next time.
  • Perhaps reducing the cooking time to 20 minutes would be advised.
  • All in all, still a satisfying treat. Not bad for baking on the fly.


Mmmmm.... Don't you just want to dig in?


Related Posts with Thumbnails