Showing posts with label pizza. Show all posts

Monday, April 9, 2012

Pesto

I used some of the ramps to make a pungent pesto. I had no pine nuts, and I knew that some recipes called for other nuts, such as walnuts and sometimes sunflower seeds, so I decided to use some pistachios.

Because I think that pesto is at its best when really fresh, I wanted to make a small batch, so I tried using the Cuisinart immersion blender and the cup it came in, but no. Ah, no. That was a no-go. I switched over to my food processor, which is a little big for small batches, so I had to add a little bit of water and keep scraping down the sides of the bowl, but it all worked out in the end.

This pesto is lovely, with quite a mighty bite! With the ramps in their raw form, the pesto was a little too strong for my kids, so the next time I make this, I may blanch the ramps first to reduce some of their pungency.

I had the pesto on crostini to accompany our lunch of roasted cauliflower and cheddar soup.


Then for dinner, I made a pesto pizza with slices of fresh tomato, because what pairs better with pesto than mozzarella and tomato? Besides, it's PIZZA.


Ramps Pesto


Ingredients:

  • 1/4 cup roasted, salted pistachios
  • 1/2 cup packed basil leaves
  • 1 bunch of 3or 4 small ramps, whites and leaves, coarsely 
  • 3 tablespoons grated Parmesan 
  • 1/4 cup extra virgin olive oil - I used a little less than 1/4 cup
  • a few tablespoons of water as needed
  • kosher salt and cracked black pepper, to taste
  • a smidge of lemon zest to taste


Directions:

  1. Blend everything in a food processor, scraping down the sides until you get the consistency you like - I happen to like a pesto on the chunky side versus one that is very liquidy, but the beauty of pesto is that it is easy to make adjustments.
  2. Serve immediately or store tightly covered in the fridge with a small layer of olive oil on top to help keep it from browning.

Monday, July 11, 2011

Parmesan-Coated Baked Tilapia

I've mentioned my pizza-love on occasion. I've also mentioned that I'm doing the South Beach diet. The first phase of the diet involves pretty stringent restriction of carbohydrates, not just refined carbs like white sugar and flour, but also fruits, starchy grains like rice and bulgur and vegetables with a high-glycemic index such as carrots, beets and other root vegetables. Basically my favorite foods.

As you can imagine, restricting carbs is pretty difficult at first, but once I get on a roll, I can really get into it. After the three-day hump, I don't crave the carbs as much, and by three-day hump, I mean three solid days of absolutely no carbs whatsoever, not even a trace of sugar. During those three days, I am ravenous, my body seeking quick energy from the carb foods I crave. I even dream about my favorites: bead, potatoes and pizza, oh my God, the pizza.

My last pizza before embarking on South Beach was an especially carb-o-rrific one topped with slices of roasted beets and roasted potato and topped with herbed goat cheese and fresh thyme. It packed a serious carb punch.


Ah, some day, I will make this again.

*wistful sigh*

In the meantime, there are plenty of delicious vegetables and protein sources waiting. Fish is on the Phase 1 South Beach menu. I make a chopped salad using canned tuna and brocoli slaw mix for a filling and satisfying lunch quite often. For dinner, I also like to make a pan-fried fillet of white fish or roasted salmon. One of the easiest ways to cook fish is baked in the oven, because it's fairly hands-off and yields great results every time.

My usual fish recipe uses parmesan , Old Bay and bread crumbs as a coating and a touch of mayo so the breading will stick. To make this South Beach friendly, I just omit the bread crumbs. I use Old Bay, paprika an Creole seasoning pretty interchangeably. The Creole seasoning is really nice with the juice from the lemon slices in this variation - it's bright and the only way I can describe it is to say that it makes my mouth sing.


Parmesan-Crusted Baked Tilapia


Ingredients:
  • tilapia fillets - or other white-fleshed fish
  • finely grated parmesan
  • Creole seasoning
  • salt
  • pepper
  • lemon slices
  • chopped parsley
  • olive oil cooking spray
Directions:
  1. Preheat the oven to 400 degrees Fahrenheit. Line a roasting pan or a cookie sheet with foil. Spray with olive oil cooking spray.
  2. Mix together the Creole seasoning and the parmesan in a pie plate.
  3. Dredge both sides of the fillets in the cheese and place on the pan. Season with a bit of salt and pepper and hit with another spray of olive oil
  4. Bake for 10-15 minutes or until the thickest part of the fillets are opaque and flake easily with a fork.
  5. Top with thinly sliced lemon and sprinkle with chopped parsley.

Sunday, May 15, 2011

Sausage and Pepper Roll

Saturday night Pizza-and-Movie Nights are a common occurrence here, and the girls generally like to have their own personal pizzas so that they can each have whatever toppings they want without the bother of their sister's loathsome choices touching their own.

So, on those nights, I generally make a huge ball of dough for their pizzas plus my own, and often have a small ball of dough left over. If I don't make a 4th pizza right then, I just stick it in the fridge and use it the next day, usually on another pizza, though occasionally I like to do something a little bit different with it. Strombolis are one of my favorite uses for extra dough, though I don't always feel like going to the deli and asking for 3 slices of capicola, 3 slices of soppressata, 3 slices of the large sandwich pepperoni, and so on.

This is basically a version of a stromboli , though here in central NY, they tend to call it a sausage roll. Most strombolis here are certain to have pepperoni, capicola and cheese in them whereas these sausage rolls are a lot like a Gianelli's sausage and pepper sandwich, which is de rigueur for politicians to grab at the New York State Fair, but this one is all rolled up in pizza dough and baked to golden-brown deliciousness.
 
.

Sausage and Pepper Roll (Stromboli)


Ingredients:

For the dough:
  • 1 1/2 cups flour
  • 1/2 T RapidRise Yeast
  • 3/8 teaspoon salt
  • Italian seasoning (optional)
  • garlic powder(optional)
  • onion powder (optional)
  • 1/2 cup hot water (between 120-130 F)
  • 1 T olive oil
For the filling:
  • olive oil
  • 1 sweet Italian sausage, sliced into 1/2 inch slices
  • 1 vidalia onion, chopped fine
  • 1/2 red bell pepper, chopped fine
  • 1/2 green bell pepper, chopped fine
  • 1 T minced sun-dried tomato
  • 1 T Italian seasoning
  • 1/2 cup marinara sauce
  • 1 cup shredded cheese - I used 1/2 cup mozzarella and the remaining 1/2 cup was a blend of provolone, asiago, parm and romano
  • olive oil
  • basil leaves
  • shredded parm

Directions:

  1. Make the dough: Preheat the oven to 450. You want the kitchen to be good and warm.
  2. Put 1 cup of the flour in a large bowl along with the yeast granules, salt and Italian seasoning, garlic powder and onion powder.
  3. Mix very well with a whisk, breaking up any clumps.
  4. Test the temperature of the water (very important when you are using RapidRise yeast). When it is about 125 F, add 1 tablespoon of olive oil. Add this to the dry ingredients and mix well with a wooden spoon until all of the water is incorporated.
  5. On a well-floured surface, dump out the dough. At this point it is a wet, scary-looking, shaggy mess. Don't worry. You still have 1/2 cup of flour nearby.
  6. Knead the dough and work in the extra flour one small handful at a time. It takes a good 4-6 minutes to get the right amount of flour in. Because there is oil in it, the dough will still be slightly tacky, though not sticky. If it's sticky, keep adding flour.

    How I like to knead: I fold over half the dough and press it in, then I turn the whole ball of dough a quarter turn, and keep on folding and pressing, adding more flour to the counter and to the dough as it absorbs. You may need more or less flour depending on the humidity.
  7. Once the dough is slightly silky, shape it into a ball, re-flour a bit of the counter, set the ball on it and dust it with more loose flour then cover it with a cloth. Let it sit for at least 30 minutes, longer is better, you can even make this a day ahead and let it have a long, slow cool rise in the fridge, but this dough works well the same day too.
  8. Crumble the Italian sausage and cook in some olive oil over medium-high heat until it starts to brown.
  9. Add the onion to the sausage and saute until the onion becomes translucent. Then add the bell pepper and cook until soft. 
  10. Toss in the minced sun-dried tomato and Italian seasoning and cook until the veggies are all soft and sausage is all browned.
  11. Add the marinara sauce and stir to coat. Cook another 2 minutes, then turn off the heat.
  12. When you are ready to shape the dough, remove the cloth. It ought to have risen nicely - if it did not, chances are the kitchen is too cold or the yeast died.
  13. Punch it down.
  14. Lower the oven's heat to 400 F.
  15. Oil a pan with olive oil (or cooking spray).
  16. Place the ball of dough on a piece of parchment paper on top of a 15 x 10 in. cookie sheet and starting in the middle of the ball, flatten it gently. DO NOT PULL or STRETCH THE DOUGH That will just rip holes in it. With your fingertips, press down, gently flattening the dough until it is a large rectangle the fits your cookie sheet.. Take your time. If the dough seems stiff and unyielding, let it rest in a warm place for 5 - 10 minutes and then continue shaping.
  17. Let it sit in a warm spot and rise 10 minutes.
  18. Now to assemble: Leaving an 1 inch border around the dough, lay down a layer of 1/2 the shredded cheese. Next, add the browned Italian sausage, onion and pepper mixture. Finally, top with the remaining cheese.
  19. Very carefully, roll it the long way pretty tightly, pinching the seams.
  20. Brush the top with olive oil - I make a garlic-infused olive oil, but any olive oil is ok.
  21. Bake in a preheated 400-degree F degree oven for 12 minutes. Take out and brush the tops with a bit more olive oil and sprinkle the tops with shredded parm. Bake for an additional 5-7 minutes until golden brown.
  22. Remove to a wire rack to cool, and let sit for a good 5 minutes before slicing.
  23. Top with fresh basil and a wee bit more shredded parm if you like.

Sunday, June 27, 2010

Pizza Addiction

When push comes to shove, pizza is my favorite food. It is simply the perfect fusion of cheese, bread and everything else you could possibly imagine, even fruit (Hello, Hawai'ian pizza!). Sometimes I feel as though I need to go to a Pizza Whores Anonymous meeting just to unburden myself of this knowledge. Instead, I'll blog about it. :)

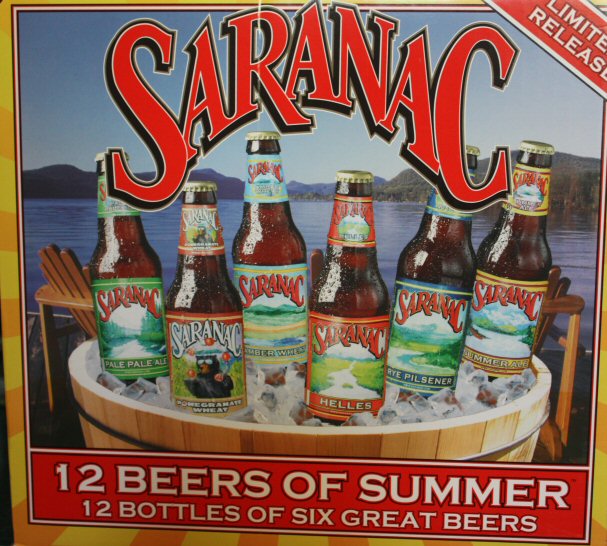
Today is a Just Me Day, the kids are at their dad's and I could make myself anything I wanted: risotto, vegetable biryani, pad thai, any one of the countless dishes my kids would not eat if I paid them $20 per bite. But no. Today, I have decreed that it is Pizza, Beer and Chocolate Day.

The chocolate: Lindt & Ghirardelli


The Summer Ale is crisp and refreshing.


Here is the Amber Wheat beer.

Mmmm, frosty.


I had to crop out the hairbrush on the table next to this beer. See?


Now THAT'S "Keeping it real," just like some other mom-blogger out there.


The pizza: my favorite sun-dried tomato, kalamata olive & artichoke pizza topped with feta, mozzarella, parmigiano reggiano, aged asiago and provolone.


Look at the sun dried tomato and the artichoke, crisping up on the edges. See the shapes of the feta chunks pushing up the blanket of melted, browned cheese.


Yum.
Seriously, YUM.


I don't have an adorable, weepy-eyed bassett hound like some other people, but I do have an obnoxious, evil-eyed orange tabby.


Just "Keepin' it Real, folks."

Wednesday, May 19, 2010

Stromboli

The girls had a half day of school today and requested pizza for lunch. There's nothing better than getting the kids to make their own food (mostly) on their own, so I agreed. As much as I love pizza - it is the staff of life, after all - I decided that I wanted something a bit different than my usual pizza. At first I was thinking spinach and ricotta calzones. I was remembering these awesome spinach, mushroom and ricotta calzones I used to get from a pizza joint near SU, when I was struck by a memory of their stromboli- even better than their calzones.

As you'll see from the recipe directions, this is NOT a low-fat dish. Dear God, there is enough fat in the assorted meats to make a cardiologist blanch. In addition, the fact that I sauteed the vegetables in the delicious rendered fat from the sausage would have Bob and Jillian from The Biggest Loser over here to kick my ass. But oh my GOD does it make it taste good!

Since I only ever eat this occasionally, it won't hurt me much, right?

:)
Stromboli
makes 2 8-inch stromboli


Ingredients:

For the dough:
  • 1 1/2 cups flour
  • 1/2 T RapidRise Yeast
  • 3/8 teaspoon salt
  • Italian seasoning (optional)
  • garlic powder(optional)
  • onion powder (optional)

  • 1/2 cup hot water (between 120-130 F)
  • 1 T olive oil
For the filling:
  • 6 slices capicola
  • 6 slice sopressatta (or genoa salami)
  • 6 slices provolone
  • olive oil
  • 2 spicy Italian sausage (or sweet Italian sausage)
  • 1/2 red bell pepper, sliced into strips
  • 1/2 yellow bell pepper, sliced into strips
  • 1 red onion, sliced into thin strips
  • pepperoni

Directions:

  1. Crumble the Italian sausage and cook(spicy or sweet, your choice) in some olive oil until nicely browned. Remove the browned sausage with a slotted spoon to a bowl and set aside.

  2. Saute the bell pepper strips in the same pan with all of the rendered fat from the sausage until they start to soften and then add the onion. Saute until everything is nice and soft and just starting to brown. Remove to a bowl and set aside.

  3. Preheat the oven to 450. You want the kitchen to be good and warm.

  4. Put 1 cup of the flour in a large bowl along with the yeast granules, salt and Italian seasoning, garlic powder and onion powder.

  5. Mix very well with a whisk, breaking up any clumps.

  6. Test the temperature of the water (very important when you are using RapidRise yeast). When it is about 125 F, add 1 tablespoon of olive oil. Add this to the dry ingredients and mix well with a wooden spoon until all of the water is incorporated.

  7. On a well-floured surface (I just use a clean counter) dump out the dough. At this point it is a wet, scary-looking, shaggy mess. Don't worry. You still have 1/2 cup of flour nearby.

  8. Knead the dough and work in the extra flour one small handful at a time. It takes a good 4-6 minutes to get the right amount of flour in. Because there is oil in it, the dough will still be slightly tacky, though not sticky. If it's sticky, keep adding flour.

    How I like to knead: I fold over half the dough and press it in, then I turn the whole ball of dough a quarter turn, and keep on folding and pressing, adding more flour to the counter and to the dough as it absorbs.

  9. Once the dough is slightly silky, shape it into a ball, re-flour a bit of the counter, set the ball on it and dust it with more loose flour then cover it with a cloth. Let it sit for at least 10 minutes, longer is better, like 30 minutes.

  10. When you are ready to shape it, remove the cloth. It ought to have risen nicely - if it did not, chances are the kitchen is too cold or the yeast died. So sad. :(

    Punch it down and divide it into 2 pieces.

  11. Oil a pan with olive oil (or cooking spray).

  12. Place the ball of dough on a floured surface (I use my silicon pastry mat), and starting in the middle of the ball, flatten it gently. DO NOT PULL or STRETCH THE DOUGH That will just rip holes in it. With your fingertips, press down, gently flattening the dough into a 6 x 10 inch rectangle. Take your time. If the dough seems stiff and unyielding, let it rest in a warm place for 5 - 10 minutes and then continue shaping it.

  13. Optional- let it sit in a warm spot and rise 10 minutes... OR

  14. Top it immediately. Leaving an 1 1/2 inch border around the dough, I lay down 3 slices of capicola, then the sopressatta and provolone. Next, I add the browned Italian sausage, the sauteed peppers and onions. Finally I top with a layer of pepperoni.

  15. Very carefully, roll it the long way pretty tightly, pinching the seams.

  16. Repeat steps 10-13 with the second ball of dough.

  17. Place the 2 stromboli on a cookie sheet. Brush the top with olive oil

  18. Bake in a preheated 400-F degree oven for 10 minutes. Take out and brush the tops with a bit more olive oil and sprinkle the tops with grated parmesan. Bake for an additional 5-7 minutes until golden brown.

  19. Remove to a wire rack to cool, and let sit for a good 5 minutes before slicing.


Notes:
  • This dough recipe doubles and triples very well. It is my basic pizza dough recipe and is very forgiving.

  • It reheats nicely, wrapped tightly in foil in a 400 degree oven, and it tastes even better when reheated.

Wednesday, April 28, 2010

Pizza for Shannon

Pizza is a staple in my house. I might go so far as to say that pizza is the staff of life. We have Pizza & Movie Night as often as we can, and as nice as it is to get take out pizza, nothing, and I do mean nothing, beats a good homemade pizza.

I have showed my daughters how to pat out the dough and make their own personal pizzas, which delighted them. Now they don't bicker over toppings or who got more slices. It's really the perfect answer, plus they get the pleasure of cooking with Mommy. My older daughter likes watching me make the dough. I know that she is dying to give kneading the dough a try. She is already pretty adept at using a box grater to shred the block of mozzarella - I just have to be sure that she does not sneak huge handfuls of the cheese when I am not looking! The littler one loves to help out too by assembling the topping ingredients. So all told, it is time together well spent and well enjoyed.

As far as toppings go, sometimes I want something really simple, like a plain old super-cheesy pizza or a spicy pepperoni pizza; other times I get all fancy with the toppings. One of my favorites has kalamata olives, artichoke hearts and feta with a sun-dried tomato pesto. It is a fairly oily and salty pizza from the brines and the feta, but on top of a cracker-thin crust and paired with some really good cheese, it is absolutely sublime.

So yeah, we take our pizza fairly seriously here. No Boboli crusts or pizza dough from a packet for me. A few weeks ago, my friend Shannon asked me for my pizza dough recipe because she said she wanted to start making pizza from scratch. I have experiemented with different dough recipes, but have settled on this, my basic pizza dough recipe. It is fairly fast-acting,and very versatile, but you have to be careful about the type of yeast you use.


Pizza


Ingredients:

  • 3 cups flour
  • 1 T RapidRise Yeast
  • 3/4 teaspoon salt
  • Italian seasoning (optional)
  • garlic powder(optional)
  • onion powder (optional)


  • 1 cup hot water (between 120-130 F)
  • 2 T olive oil

Directions:

  1. Preheat the oven to 450. You want the kitchen to be good and warm.

  2. Put 2 cups of the flour in a large bowl along with the yeast granules, salt and Italian seasoning, garlic powder and onion powder.

  3. Mix very well with a whisk, breaking up any clumps.

  4. Test the temperature of the water (very important when you are using RapidRise yeast). When it is about 125 F, add 2 tablespoons of olive oil. Add this to the dry ingredients and mix well with a wooden spoon until all of the water is incorporated.

  5. On a well-floured surface (I just use a clean counter) dump out the dough. At this point it is a wet, scary-looking, shaggy mess. Don't worry. You still have 1 cup of flour nearby.

  6. Knead the dough and work in the extra flour one small handful at a time. It takes a good 4-6 minutes to get the right amount of flour in. Because there is oil in it, the dough will still be slightly tacky, though not sticky. If it's sticky, keep adding flour. You will use as little as 1/2 cup of flour and maybe even the entire cup. You'd be surprised what a different the humidity of the air can make.

    How I like to knead: I fold over half the dough and press it in, then I turn the whole ball of dough a quarter turn, and keep on folding and pressing, adding more flour to the counter and to the dough as it absorbs.

  7. Once the dough is slightly silky, shape it into a ball, re-flour a bit of the counter, set the ball on it and dust it with more loose flour then cover it with a cloth. Let it sit for at least 10 minutes, longer is better, like 30 minutes.

  8. When you are ready to shape it, remove the cloth. It ought to have risen nicely - if it did not, chances are the kitchen is too cold or the yeast died. So sad. :(

    Punch it down and divide it into pieces. It makes 2 12-inch pizzas or 4 smaller personal pizzas. or, if you are careful and patient, 3 10-inch pizzas with cracker-thin crusts.

  9. Oil a pan with olive oil (or cooking spray).

  10. Place the ball of dough in the center, and starting in the middle of the ball, flatten it gently. DO NOT PULL or STRETCH THE DOUGH That will just rip holes in it. With your fingertips, press down, gently flattening the dough. It is elastic and will stretch out if you are patient. I turn the pan as I do it to keep it even. If you find that the dough is a little bit resistant and springs back into a smaller shape, put it aside near the oven and let it sit for 5 minutes. The heat will help relax the dough until it's ready to be patted out to a large circle.

  11. Optional- let it sit in a warm spot and rise 10 minutes... OR

  12. Top it immediately with sauce and toppings.

  13. Bake in a wicked hot oven (450 F) for 9-12 minutes. It really depends on the thickness of your crust, the accuracy of your oven, how may toppings you have. At about 9 minutes in, check on it.

  14. Let sit for a good 5 minutes before slicing.


Notes:
  • Flour I prefer bread flour, but all-purpose works fine too, especially with 1 tablespoon of gluten per cup of flour, but if you have only All Purpose flour, that will be just fine. All the extra gluten does is give the dough a bit more structure. If you like a really cracker-thin crust, though, you might not need the extra gluten.

  • Yeast I have made this with regular old active yeast (non Bread machine, non RapidRise), and have had good results, even with a shorter rising time, although it will probably NOT be ready in just a 10-minute rise. Plan on at least a 30-minute rise PLUS a second rise for 10 minutes once you have the dough patted into shape.

  • Kneading Your first time with this recipe may be weird, especially if you are not used to kneading. This starts out as a very rough, sticky dough, so you have to be generous with the flour and don't be gentle with the dough either. Work that flour in there. It is TOTALLY therapeutic and definitely worth it.

  • Optional Seasonings I have been using this recipe for, no joke, 10 years now. I only recently hit on adding garlic powder and onion powder to the dry ingredients at the start. The kids both commented on how awesome it was. You can add finely grated parm too if you like, though really I like to save the cheese for the topping.

    You may use a bit of whole wheat flour too, but I would not substitute more than 1 cup of the AP flour for WW. After that point you really have to do some fancy finagling and add extra gluten to get the texture right. JMO.

  • Pans I really like the perforated pizza pans, especially if I go a little heavy-handed with the toppings. Sometimes a lot of raw veggies can make things a bit soggy.

    However, when the girls make their own personal pizzas, I just use cookie sheets. If you really like a thicker crust, I would suggest using a perforated pan and lowering the heat to 400/425 and baking it longer.

    If you have a pizza stone, then I am jealous.

  • Adjustments This recipe halves very well to make one pizza. You can also take those halved measurements and add it to the regular recipe to make 3 pizzas. It also doubles nicely to make an obscene amount of pizza.

    ALSO! If you make the regular batch but decide that you just aren't feeling gluttonous enough to eat 2 whole pizzas in one sitting, you can take the 2nd ball of dough and put it in a plastic bread bag and stick it in the fridge. Give it some room in the bag because it WILL expand.

    When you are ready to make it, say, the next day, take it out and let it come to room temperature. Then shape to fit the pan, top, bake and devour.

Gallery of Pizzas


Here is my younger daughter's favorite, your standard pepperoni pizza.

She really patted out the dough on her own after I got her started with the ball of dough. The first time she made this, she layered the pepperoni slices on so thickly, it looked as though the pizza was shellacked with pepperoni!

She ended up pulling off almost all of them, but she still devoured the pizza.


This is my older daughter's specialty: the stuffed-crust, super-cheesey pizza.

She pats out the dough extra wide so that the crusts are super thin and hanging over the edge of the pan. Then she takes string cheese and rips it into long, thin shreds, places them around the perimeter and rolls up the extra crust around it.

She finishes it off by mounding it with shredded mozzarella and grated parmigiano and pecorino.


My most recent pizza, this is a white pizza topped with andouille, red potato and a sprinkling of thyme.

I really wanted something different and was not in the mood for a tomato sauce base.


It was really, really delicious.
Related Posts with Thumbnails